VM Is Too Small? Resize the VM
The CloudTrips Linux VM no longer has enough CPU or memory for its workload. You do not need to rebuild it: Azure can change the VM’s size, which is the SKU that determines its virtual CPUs, memory, temporary storage, supported disk and network limits, features, and price.
Resizing changes compute capacity, not the capacity of the OS or data disks. If storage space is the problem, resize or add a managed disk instead. If application demand changes continuously, repeatedly resizing one VM is also not an autoscaling design; consider a scale set or a managed compute service.
This trip resizes the Linux VM from the previous trip, verifies the additional capacity inside Ubuntu, and then returns it to its original size to avoid leaving a more expensive lab VM running.
Understand the Impact
Treat a VM resize as a disruptive maintenance operation:
- Resizing a running VM causes it to restart.
- If the target size is unavailable on the current Azure host cluster, the VM must be stopped and deallocated before it can move to compatible capacity.
- Deallocation can erase data on the VM’s temporary disk.
- Managed OS and data disks remain intact.
- A dynamic public IP can change after deallocation. The Standard public IP created by the Linux VM trip normally uses static allocation, but verify the address before reconnecting.
- The new size can have different disk, network, architecture, and feature support. Azure shows only compatible resize options for the current VM.
Do not store important data on the temporary disk. Its purpose is disposable scratch space, not persistent application storage.
Confirm the Prerequisite VM
This trip expects:
Subscription: CloudTrips TEST
Resource group: rg-cloudtrips-compute-test-weu
Virtual machine: vm-cloudtrips-linux01-test-weu
Operating system: Ubuntu Server
If that VM does not exist, complete Need a Linux Server Quickly? Create a Linux VM first.
Open the VM and confirm that its status is Running. On Overview, record:
Original VM size: <CURRENT-SIZE>
Public IP address: <CURRENT-PUBLIC-IP>
Private IP address: <CURRENT-PRIVATE-IP>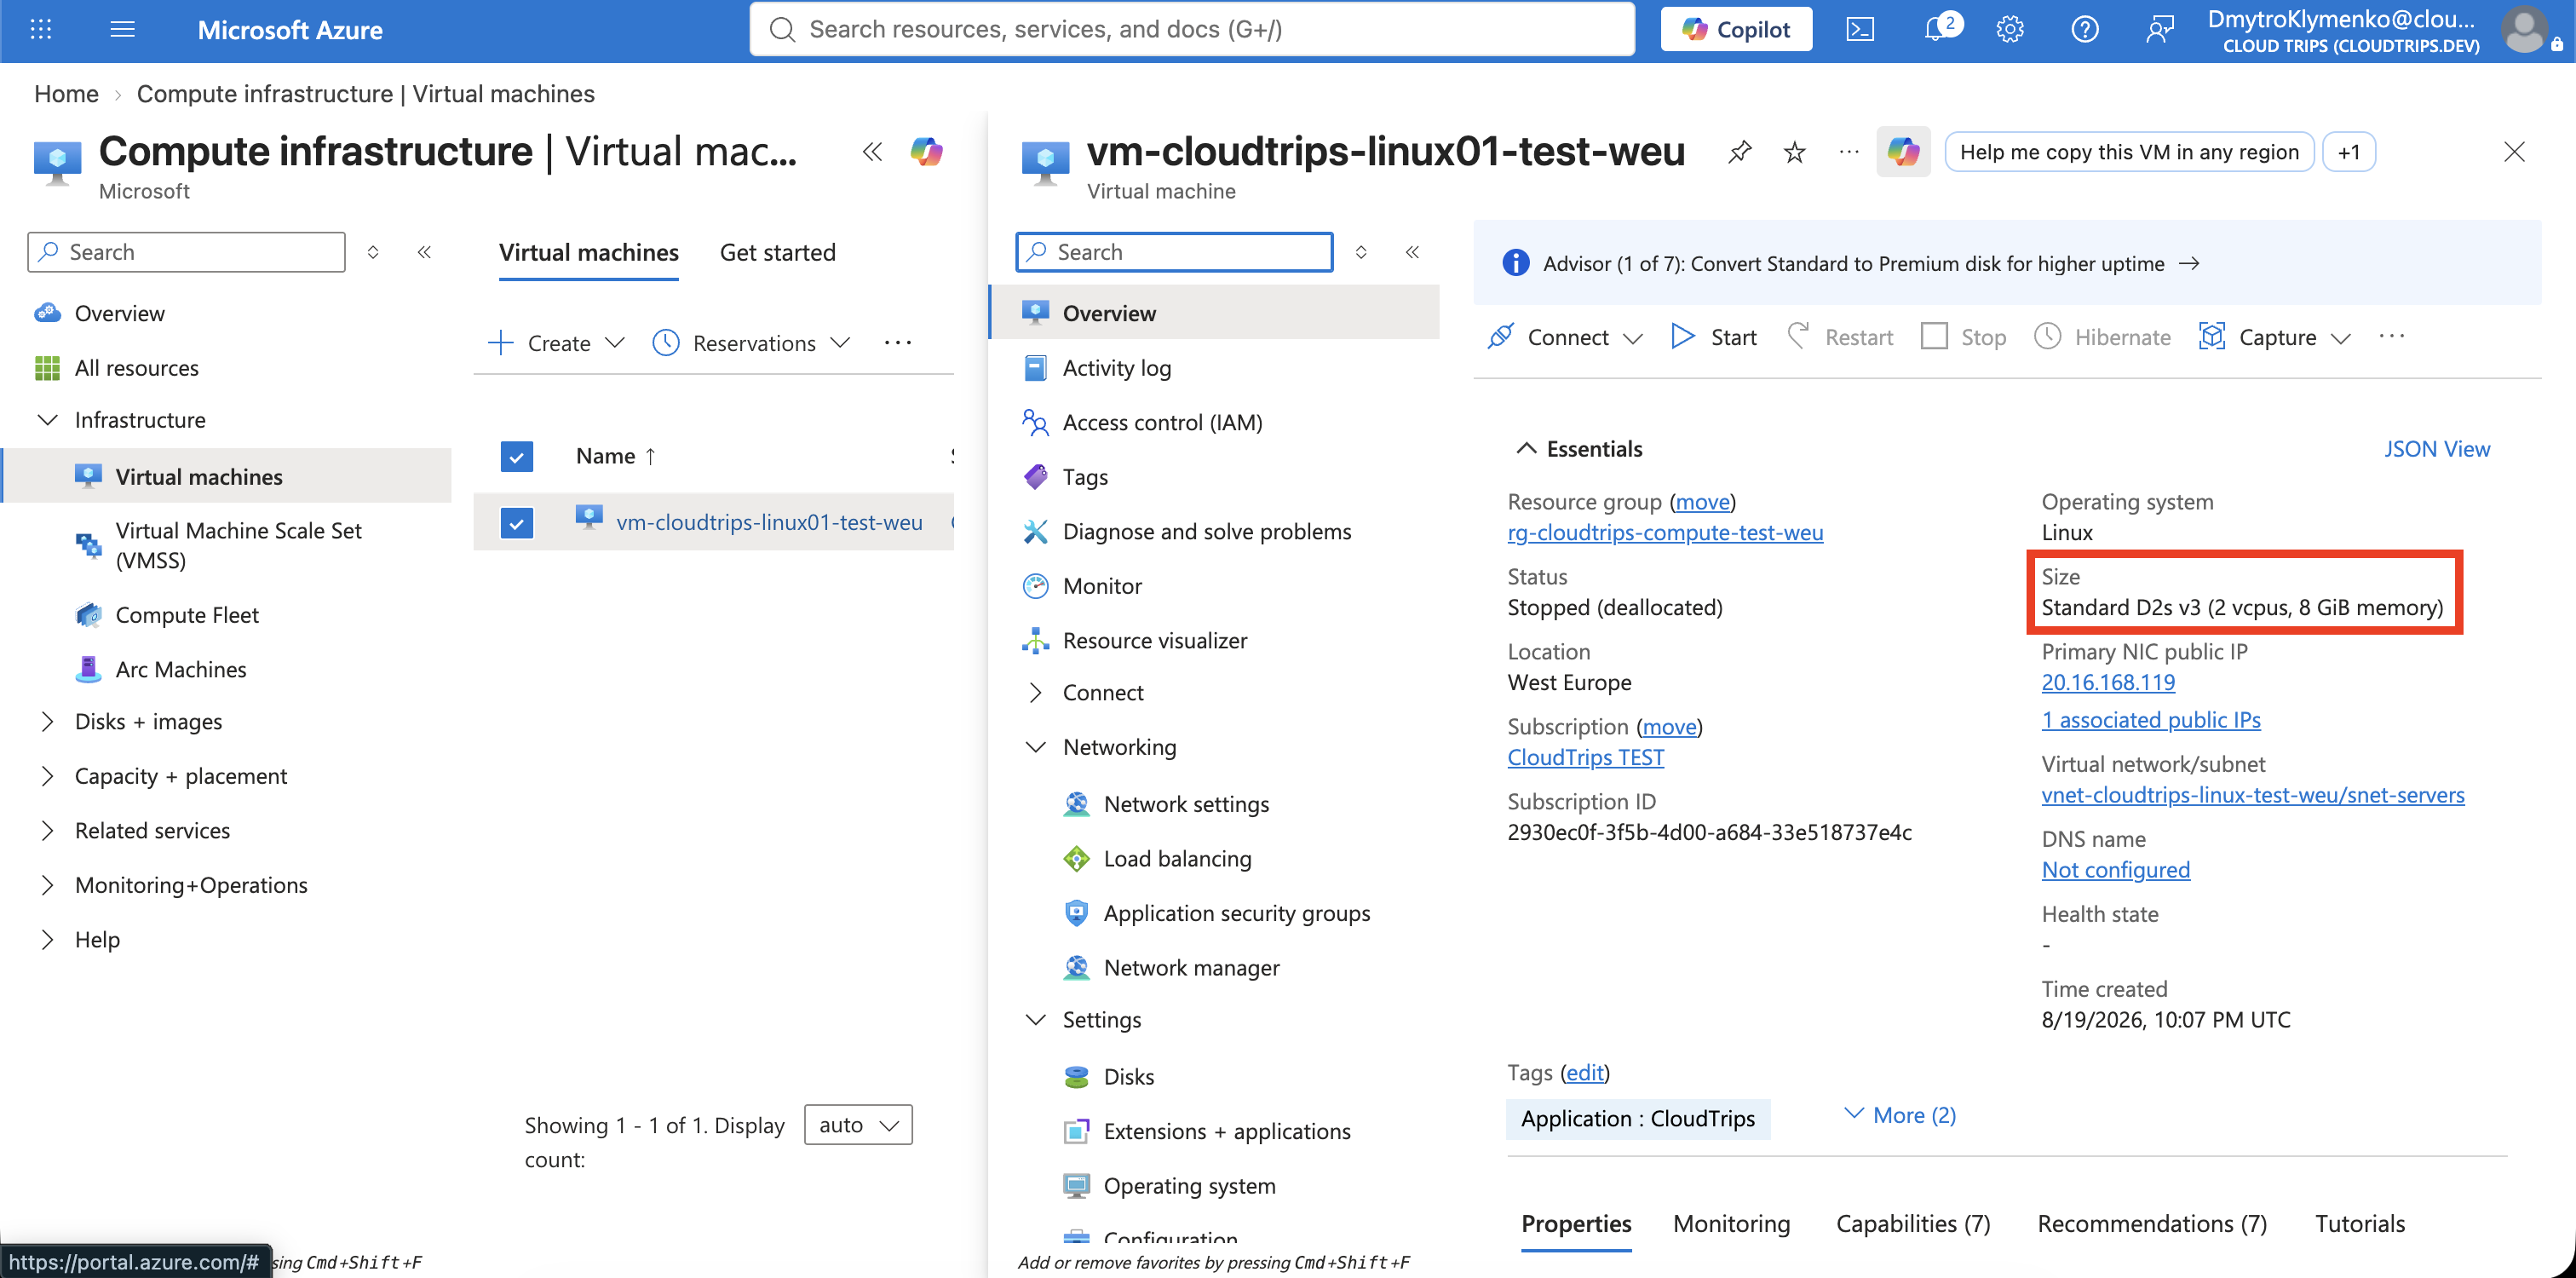
Do not assume that the original size is Standard_B2s. It might be
Standard_D2s_v3 if that was the size available during VM creation. You will
need the exact original value when resizing back.
Measure the Current Guest Capacity
Connect through SSH with the private key from the Linux VM trip:
ssh \
  -i ~/.ssh/sshkey-cloudtrips-linux-test-weu.pem \
  azureuser@<CURRENT-PUBLIC-IP>
Run:
hostname
nproc
free -h
uptime
Record the CPU count and total memory. uptime also gives you a simple way to
confirm later that the VM restarted. Exit the session:
exitSelect a Larger Compatible Size
In the VM menu, open:
Availability + scale > SizeAzure lists sizes to which this particular VM can currently be resized. Compare the vCPU, RAM, supported disks, and estimated price. For this short exercise, use the following preference:
If original size is Standard_B2s: choose Standard_D4s_v3
If original size is Standard_D2s_v3: choose Standard_D4s_v3
Otherwise: choose a compatible size with more vCPUs and memory
The purpose is to demonstrate a real increase. Do not select an expensive GPU, high-performance-compute, or memory-optimized size merely for this lab.
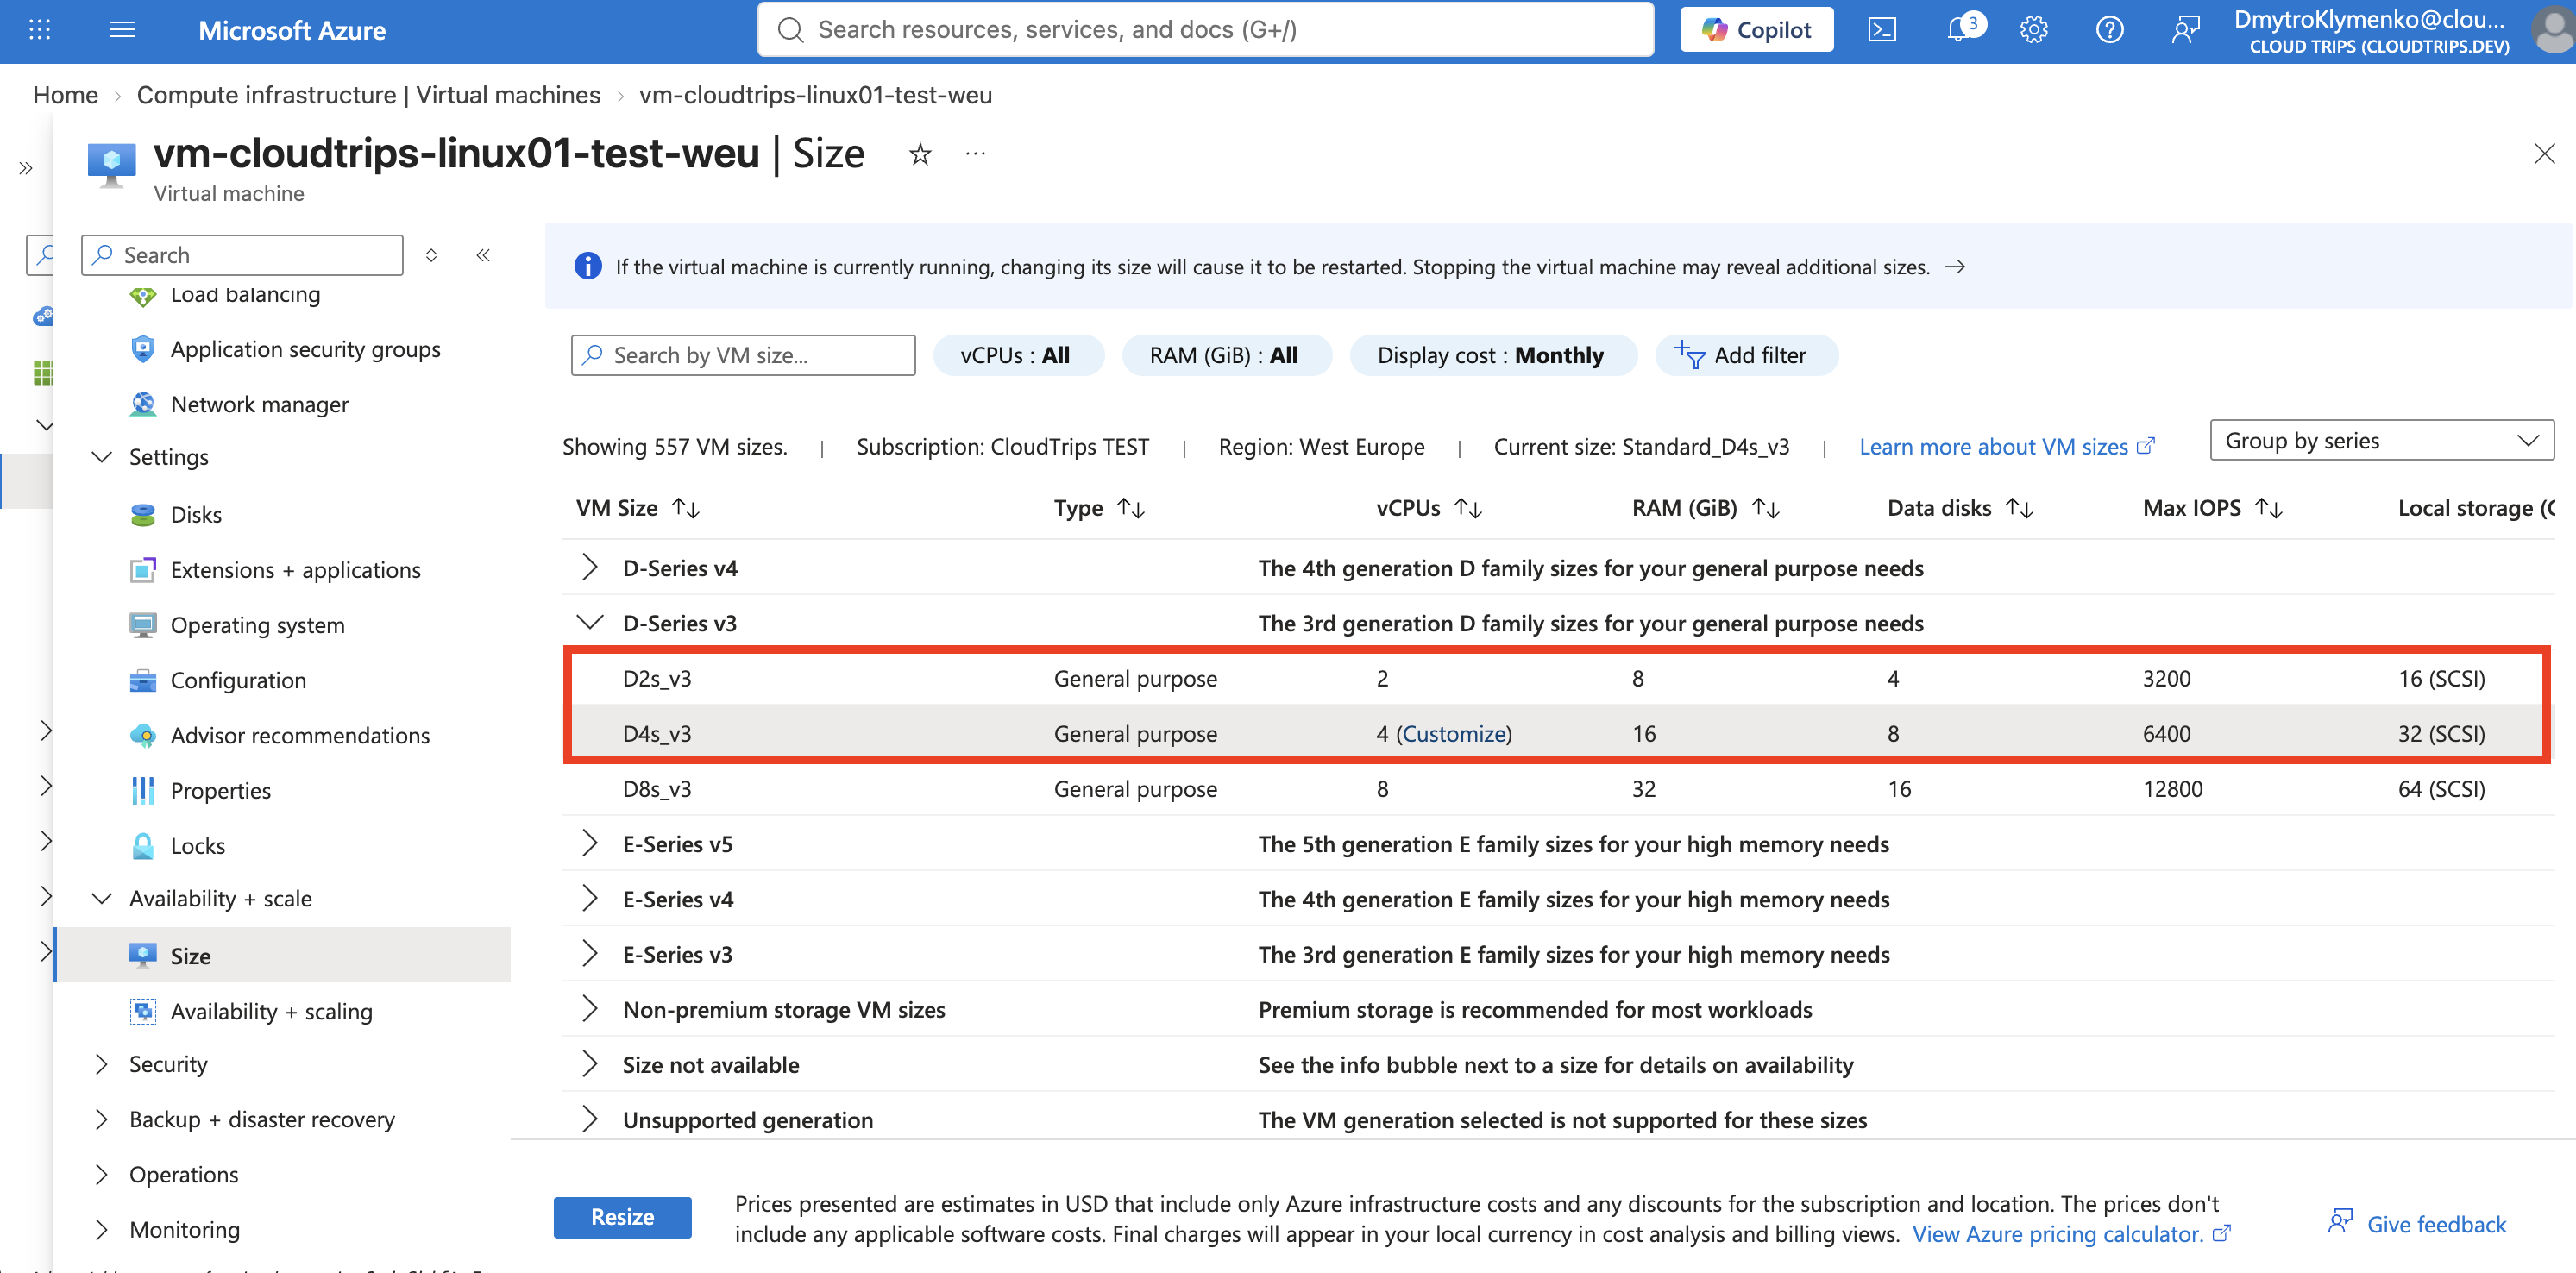
Before continuing, confirm that the target supports the VM’s current disk type, architecture, Trusted Launch configuration, and required network features.
Resize the Running VM
Select the target size and then select Resize. Azure warns that the VM will restart. Confirm the operation.
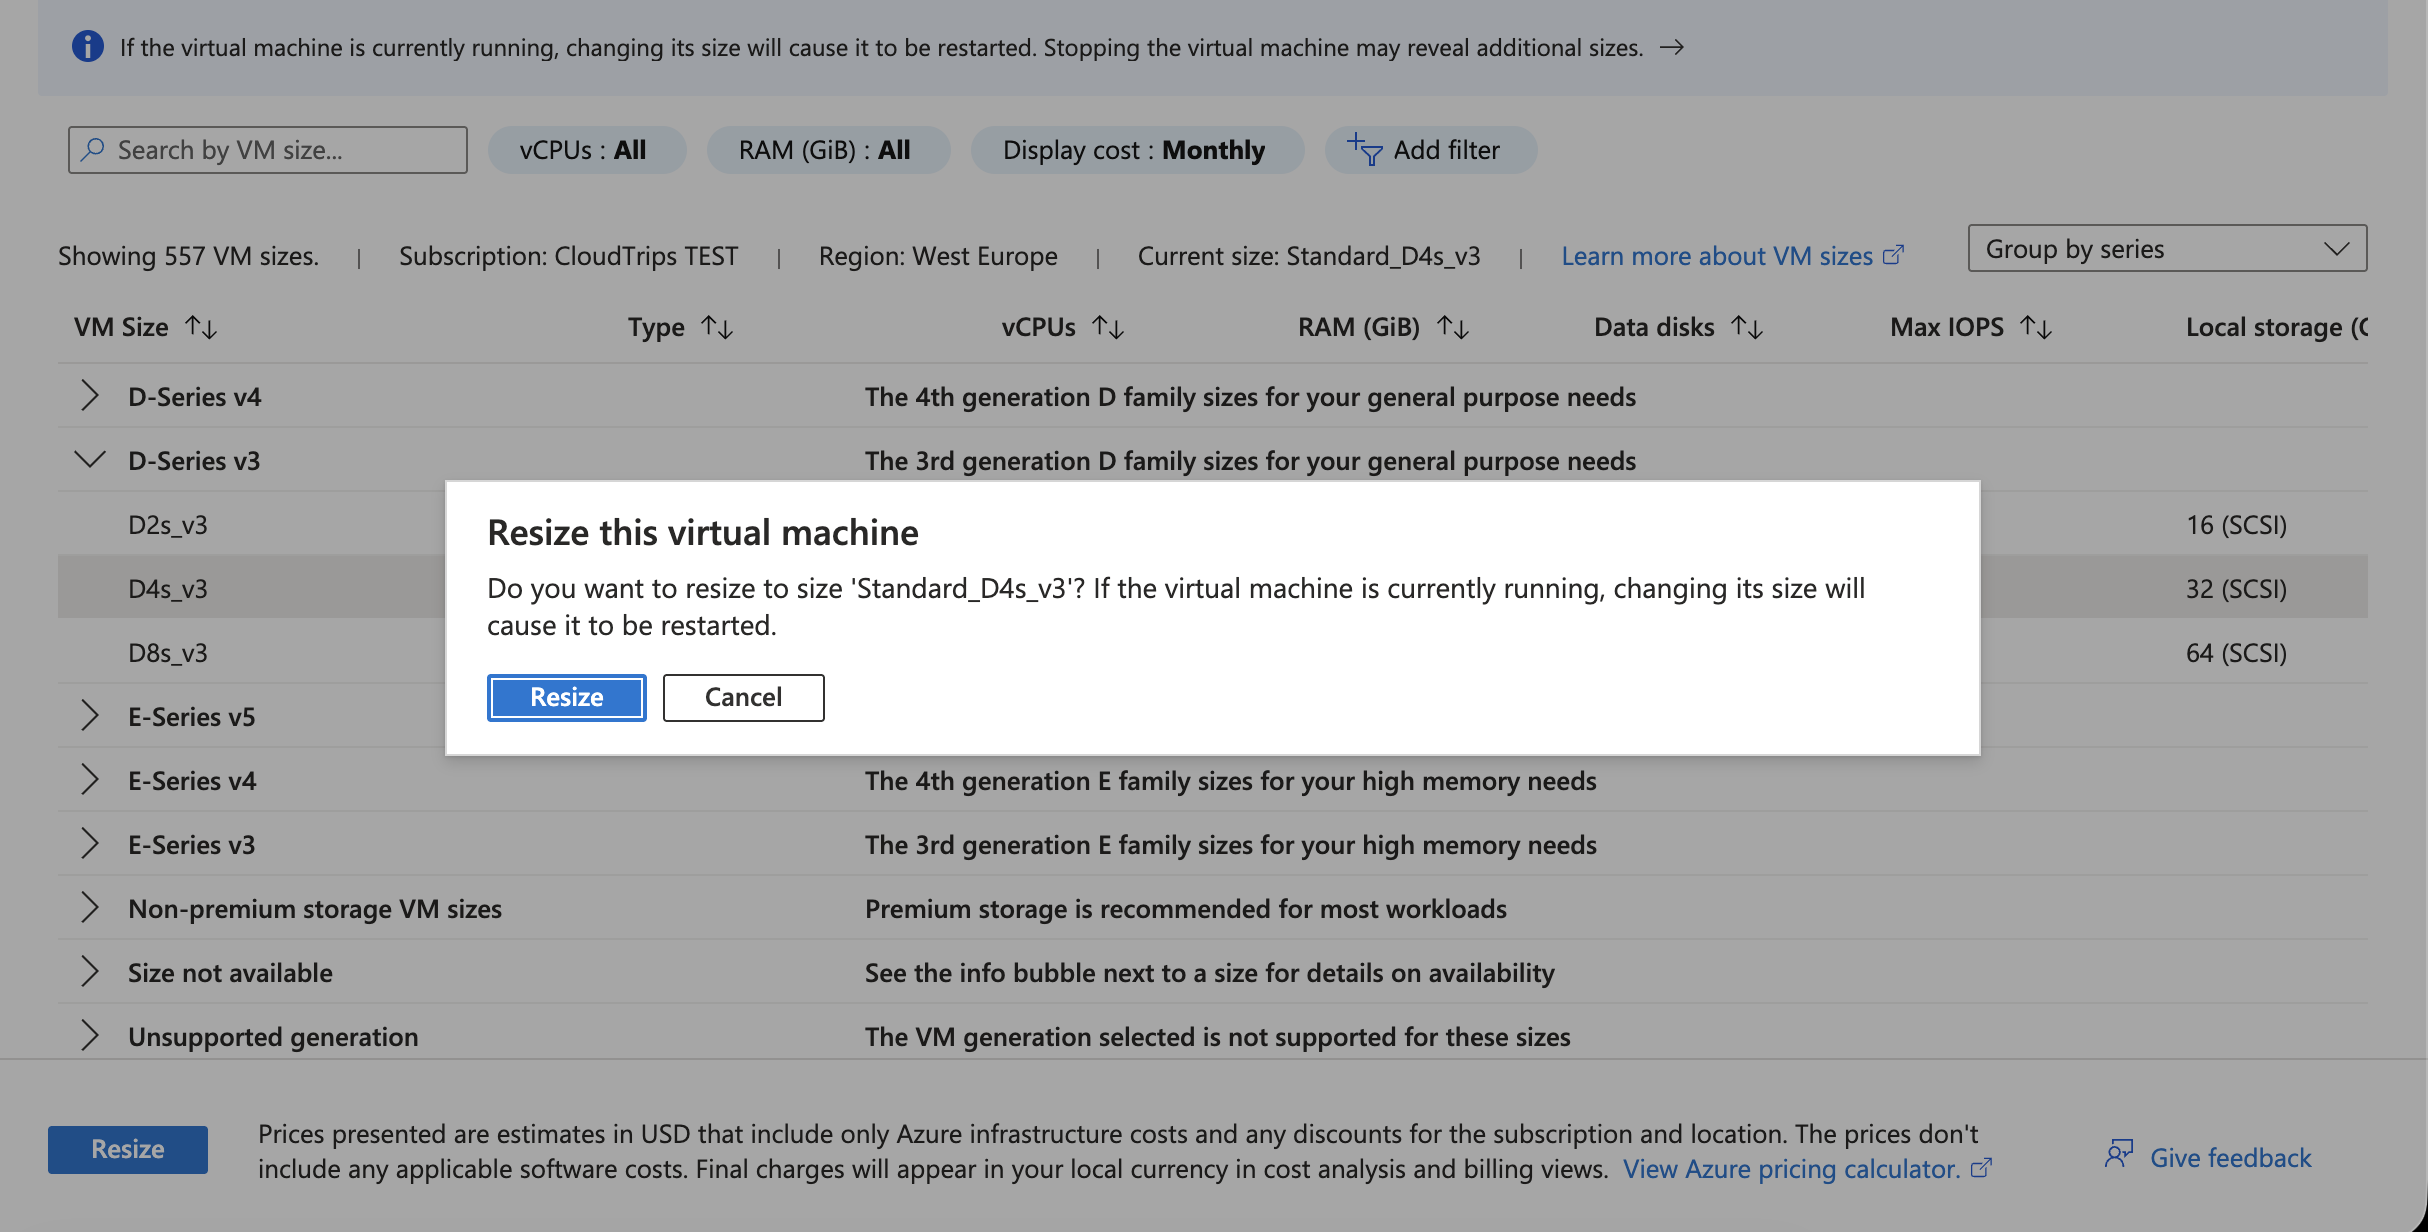
The portal may temporarily show states such as Updating, Stopping, or Starting. Wait until the VM returns to Running.
If the required size is not listed while the VM is running:
- Select Stop on the VM Overview.
- Wait for Stopped (deallocated), not only Stopped.
- Return to Availability + scale > Size.
- Select the target size and choose Resize.
- Select Start after the resize completes.
Deallocation can place the VM on another host cluster and reveal additional sizes. Recheck the public IP address after the VM starts.
Verify the Azure and Guest State
On Overview, confirm:
Status: Running
Size: <TARGET-SIZE>
OS disk: Still attached
NIC: Still attached
Private IP: Unchanged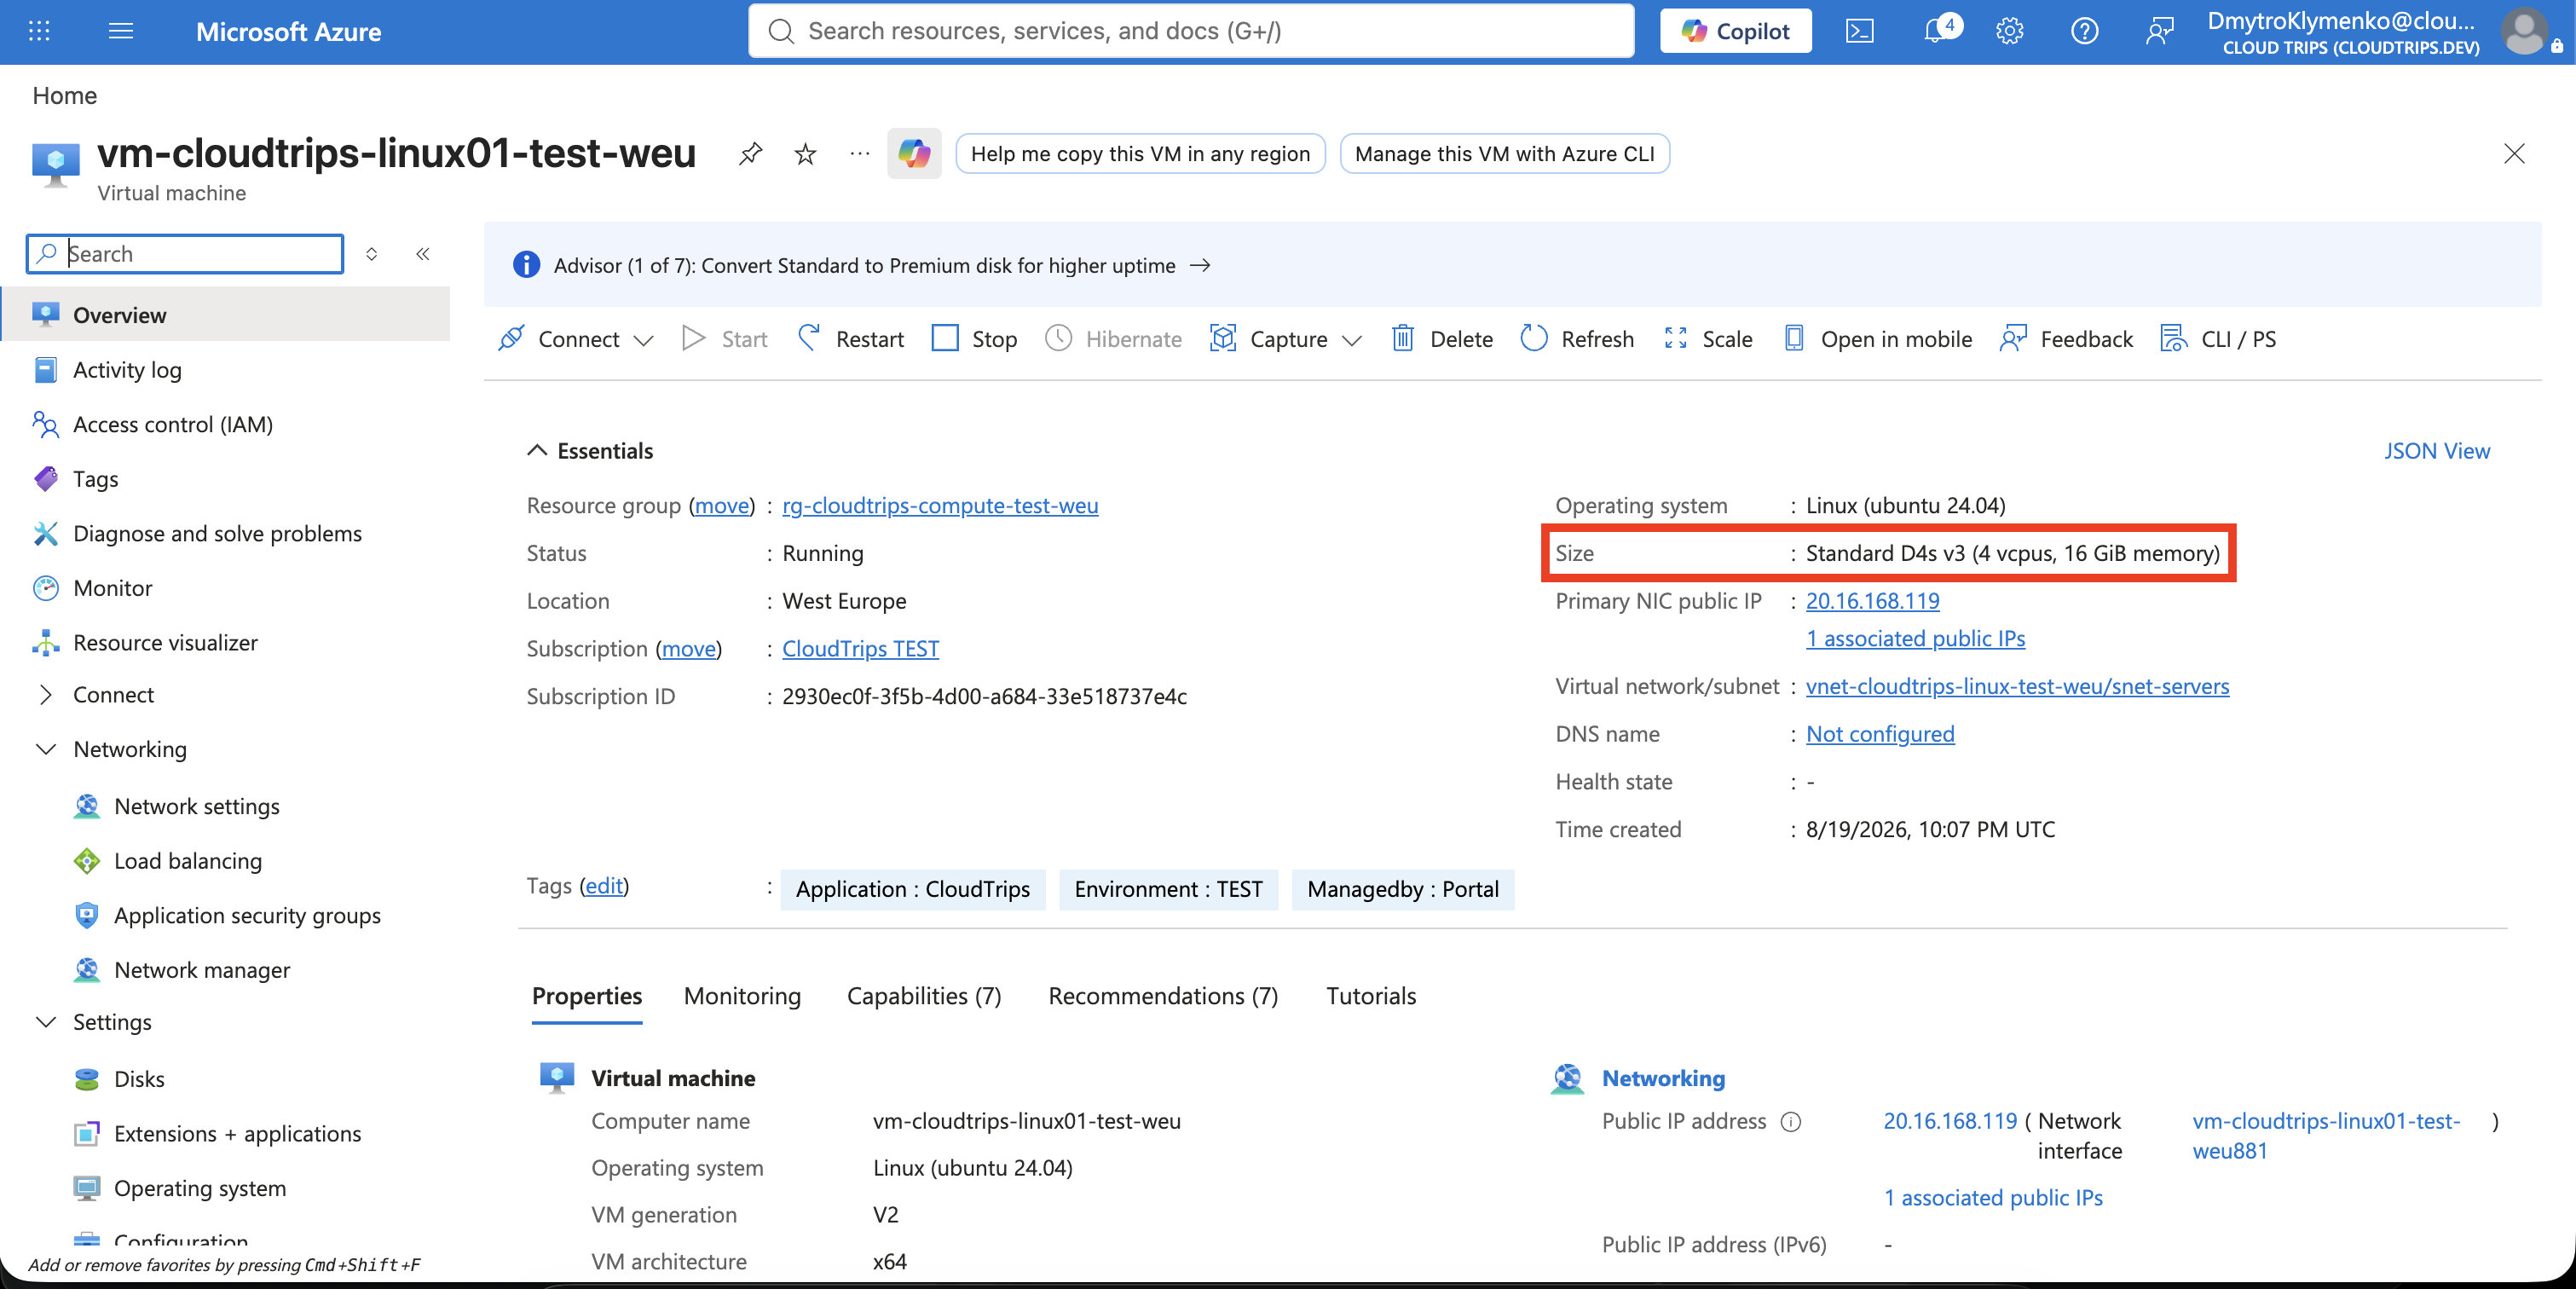
The portal displays the requested VM model. A failed allocation can leave the model showing the requested size even though the VM continues on its previous running size, so verify capacity inside Linux as well.
Reconnect using the currently displayed public IP:
ssh \
  -i ~/.ssh/sshkey-cloudtrips-linux-test-weu.pem \
  azureuser@<CURRENT-VM-PUBLIC-IP>
Run:
hostname
nproc
free -h
uptime
lsblk
Confirm that:
- The hostname is still
vm-cloudtrips-linux01-test-weu. nprocandfree -hreflect the target size’s CPU and memory.- The short uptime confirms the restart.
- The managed OS disk is present.
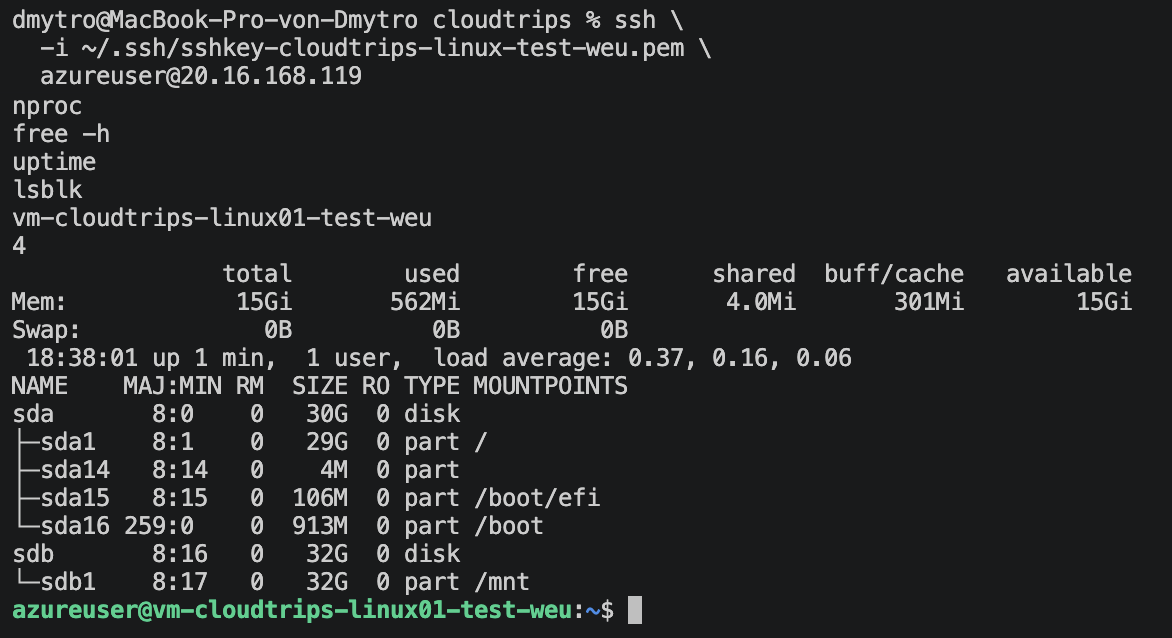
The VM now has more compute capacity without being rebuilt. Its operating system, configuration, identity, NIC, and managed disk were retained.
Return to the Original Size
The larger VM begins using the target size’s price when it is allocated. For
this lab, return to the exact <CURRENT-SIZE> value recorded earlier:
- Exit the SSH session.
- Open Availability + scale > Size.
- Select the original size.
- Select Resize and accept the restart.
- Wait for Running.
- Confirm the original size on Overview.
If the original size is not available, stop and deallocate the VM, check the size list again, resize, and restart it. If Azure capacity still prevents the change, leave the VM Stopped (deallocated) rather than running the more expensive target size.
Keep the VM and shared rg-cloudtrips-compute-test-weu resource group for the
next Add data disk trip. Do not delete the resource group because it can
also contain the Windows VM and its resources.