VM Needs Protection? Configure JIT Access and Host Encryption
An administrator needs occasional access to a VM, while its stored data needs protection. A permanently open administration port increases exposure. Just-in-time (JIT) access permits a selected source IP for a limited period. Azure managed disks already have encryption at rest; encryption at host also protects temporary disks and disk caches on the physical host.
Prepare Encryption and Create a VM
In Cloud Shell → Bash, select your lab subscription and register host encryption:
az account set --subscription "CloudTrips TEST"
az feature register --namespace Microsoft.Compute --name EncryptionAtHost
az feature show --namespace Microsoft.Compute --name EncryptionAtHost --query properties.state -o tsv
Wait until the last command returns Registered, rerunning it as needed. Create Virtual machines → Azure virtual machine:
Resource group: rg-cloudtrips-vmsecurity-test-weu
VM name: vm-ctsecureweu
Region: West Europe
Image: Ubuntu Server 24.04 LTS, x64
Size: Standard_D2alds_v6 (2 vCPU, 4 GiB)
Authentication: SSH public key → Generate new key pair
Administrator: azureuser
Public inbound ports: None
Disks → Encryption at host: Enabled
Disks → Key management: Platform-managed key
Networking: new VNet and subnet, public IP, Basic NIC NSG
Choose a supported size if host encryption is unavailable for your selected size. Review the cost, create the VM, and save the SSH private key securely. After deployment, open VM → Disks → Additional settings.
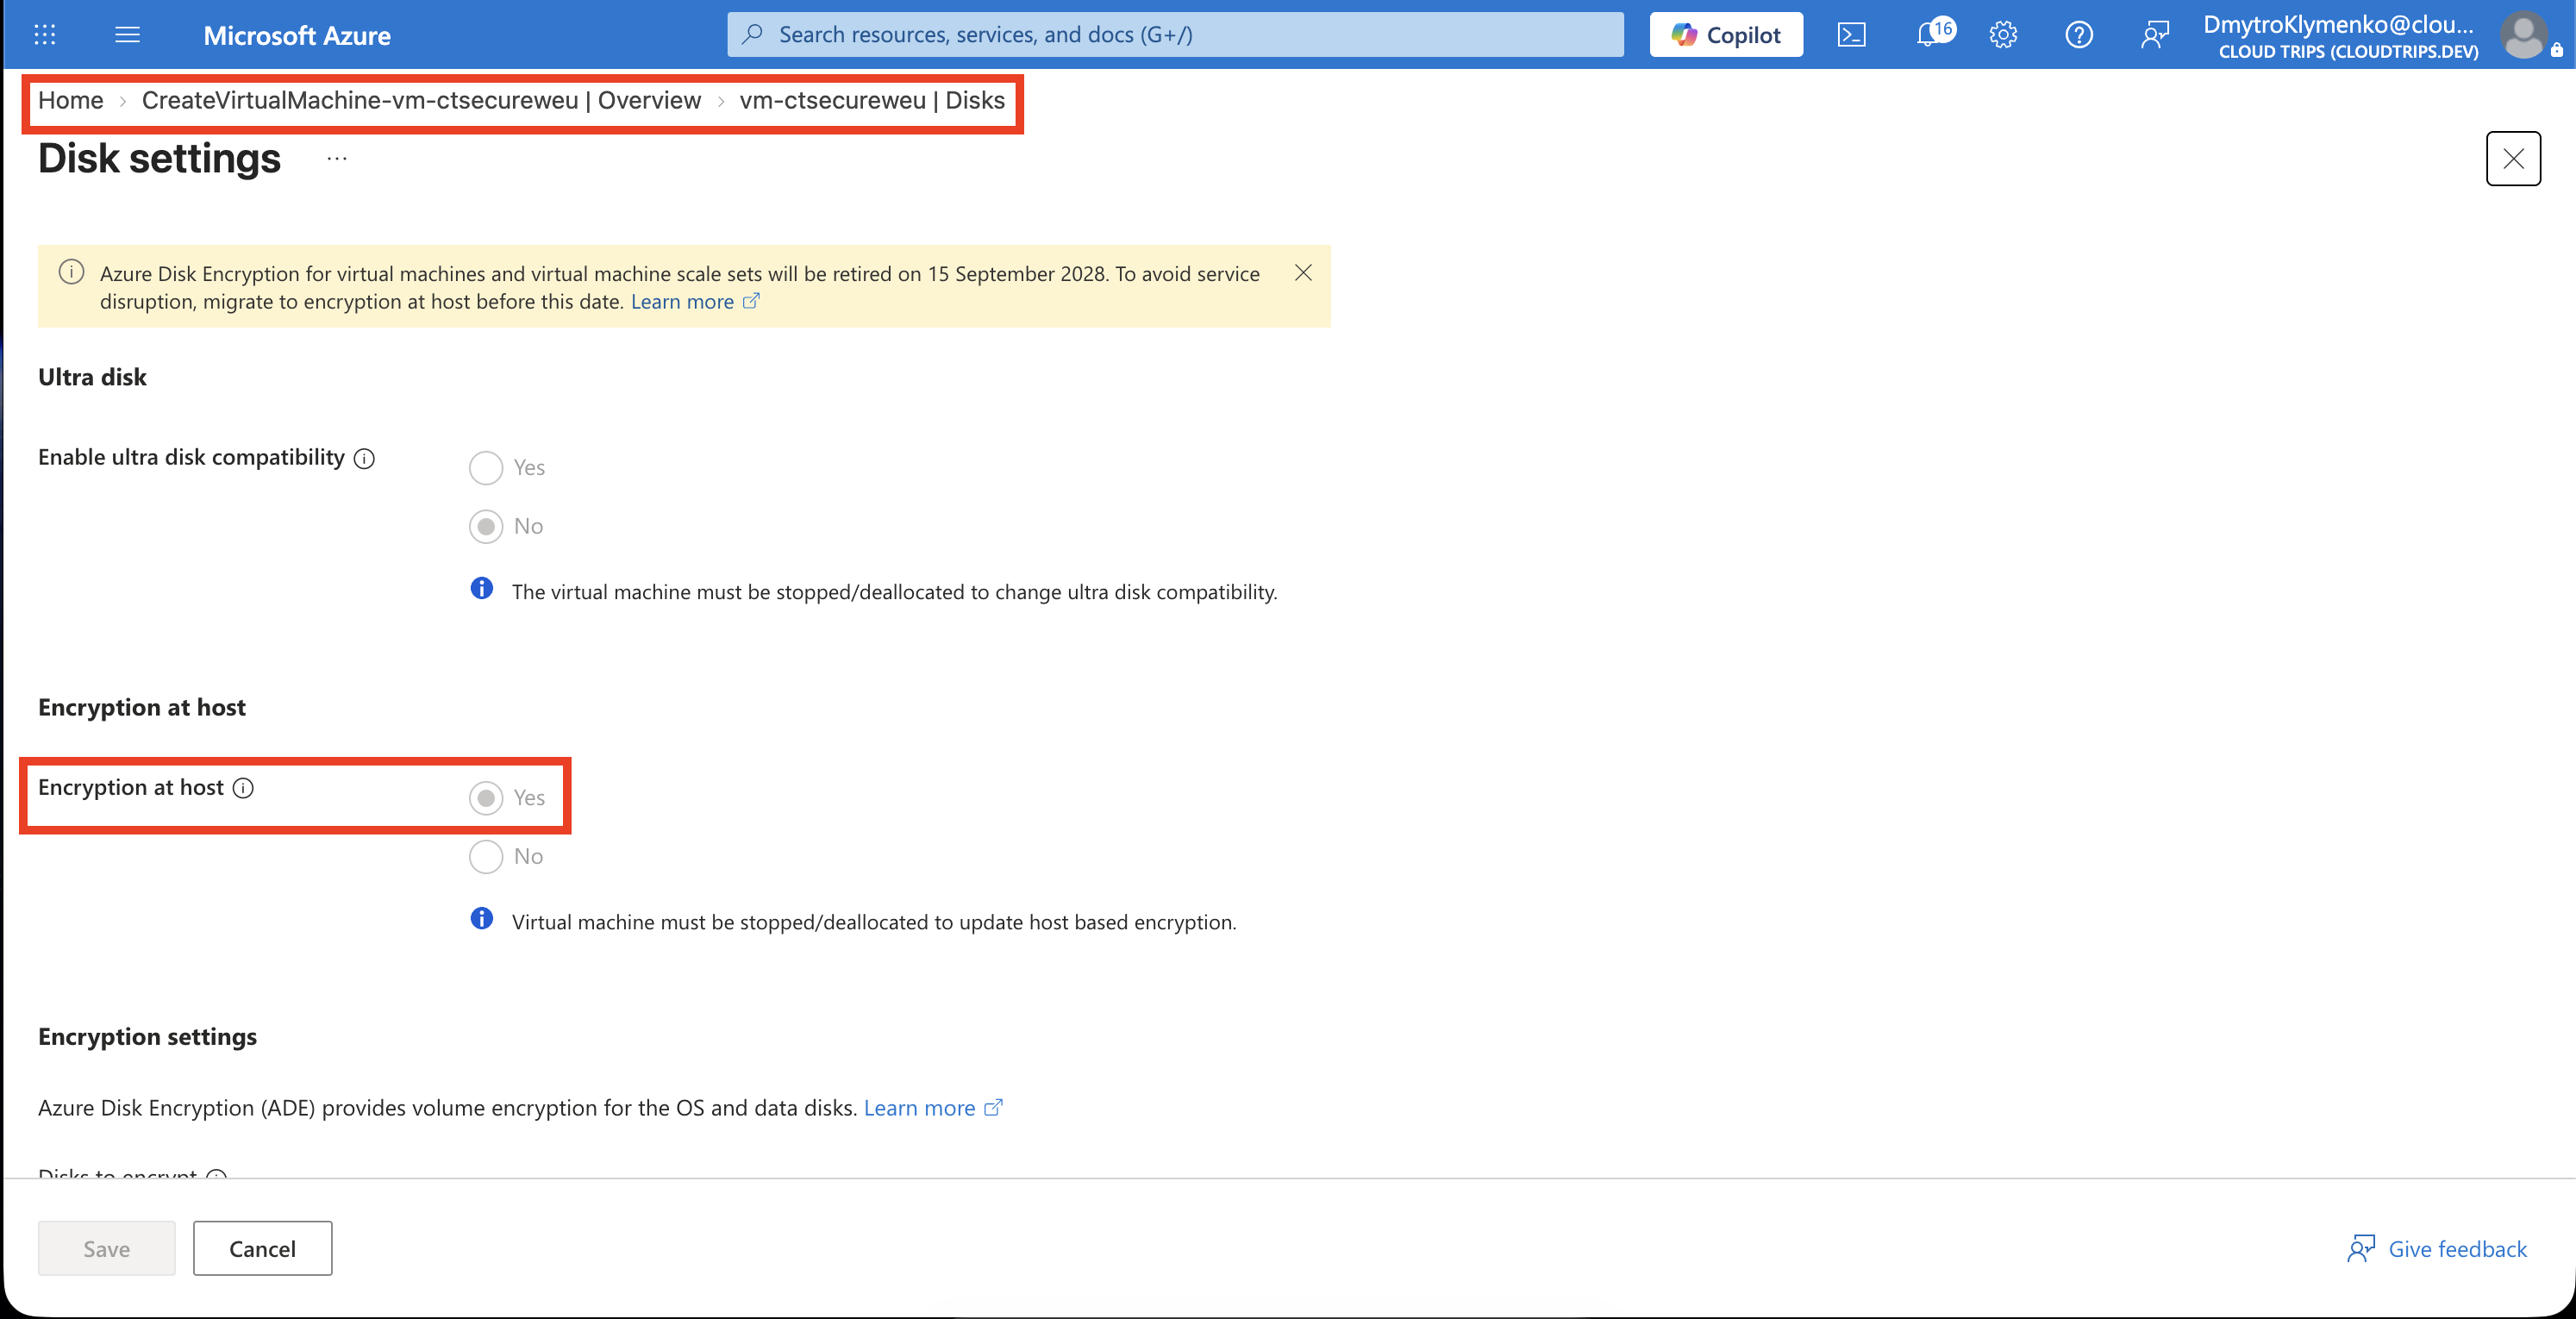
Check Encryption at host: Enabled. Azure manages the encryption keys for this exercise.
Enable Temporary SSH Access
Open Defender for Cloud → Environment settings → CloudTrips TEST → Defender plans. JIT requires Defender for Servers Plan 2. Review its subscription-wide coverage and price, record the existing setting, and enable Plan 2 for the lab if needed. Existing servers in that scope can also incur charges.
Open Virtual machines → vm-ctsecureweu → Settings → Configuration → Enable just-in-time. Then open Defender for Cloud → Workload protections → Just-in-time VM access → Configured, right-click the VM, and select Edit. Replace the default access settings with:
Port: 22
Protocol: TCP
Allowed source IPs: Per request
Maximum request time: 1 hour
Save the policy. The VM remains under Configured, ready for an access request.
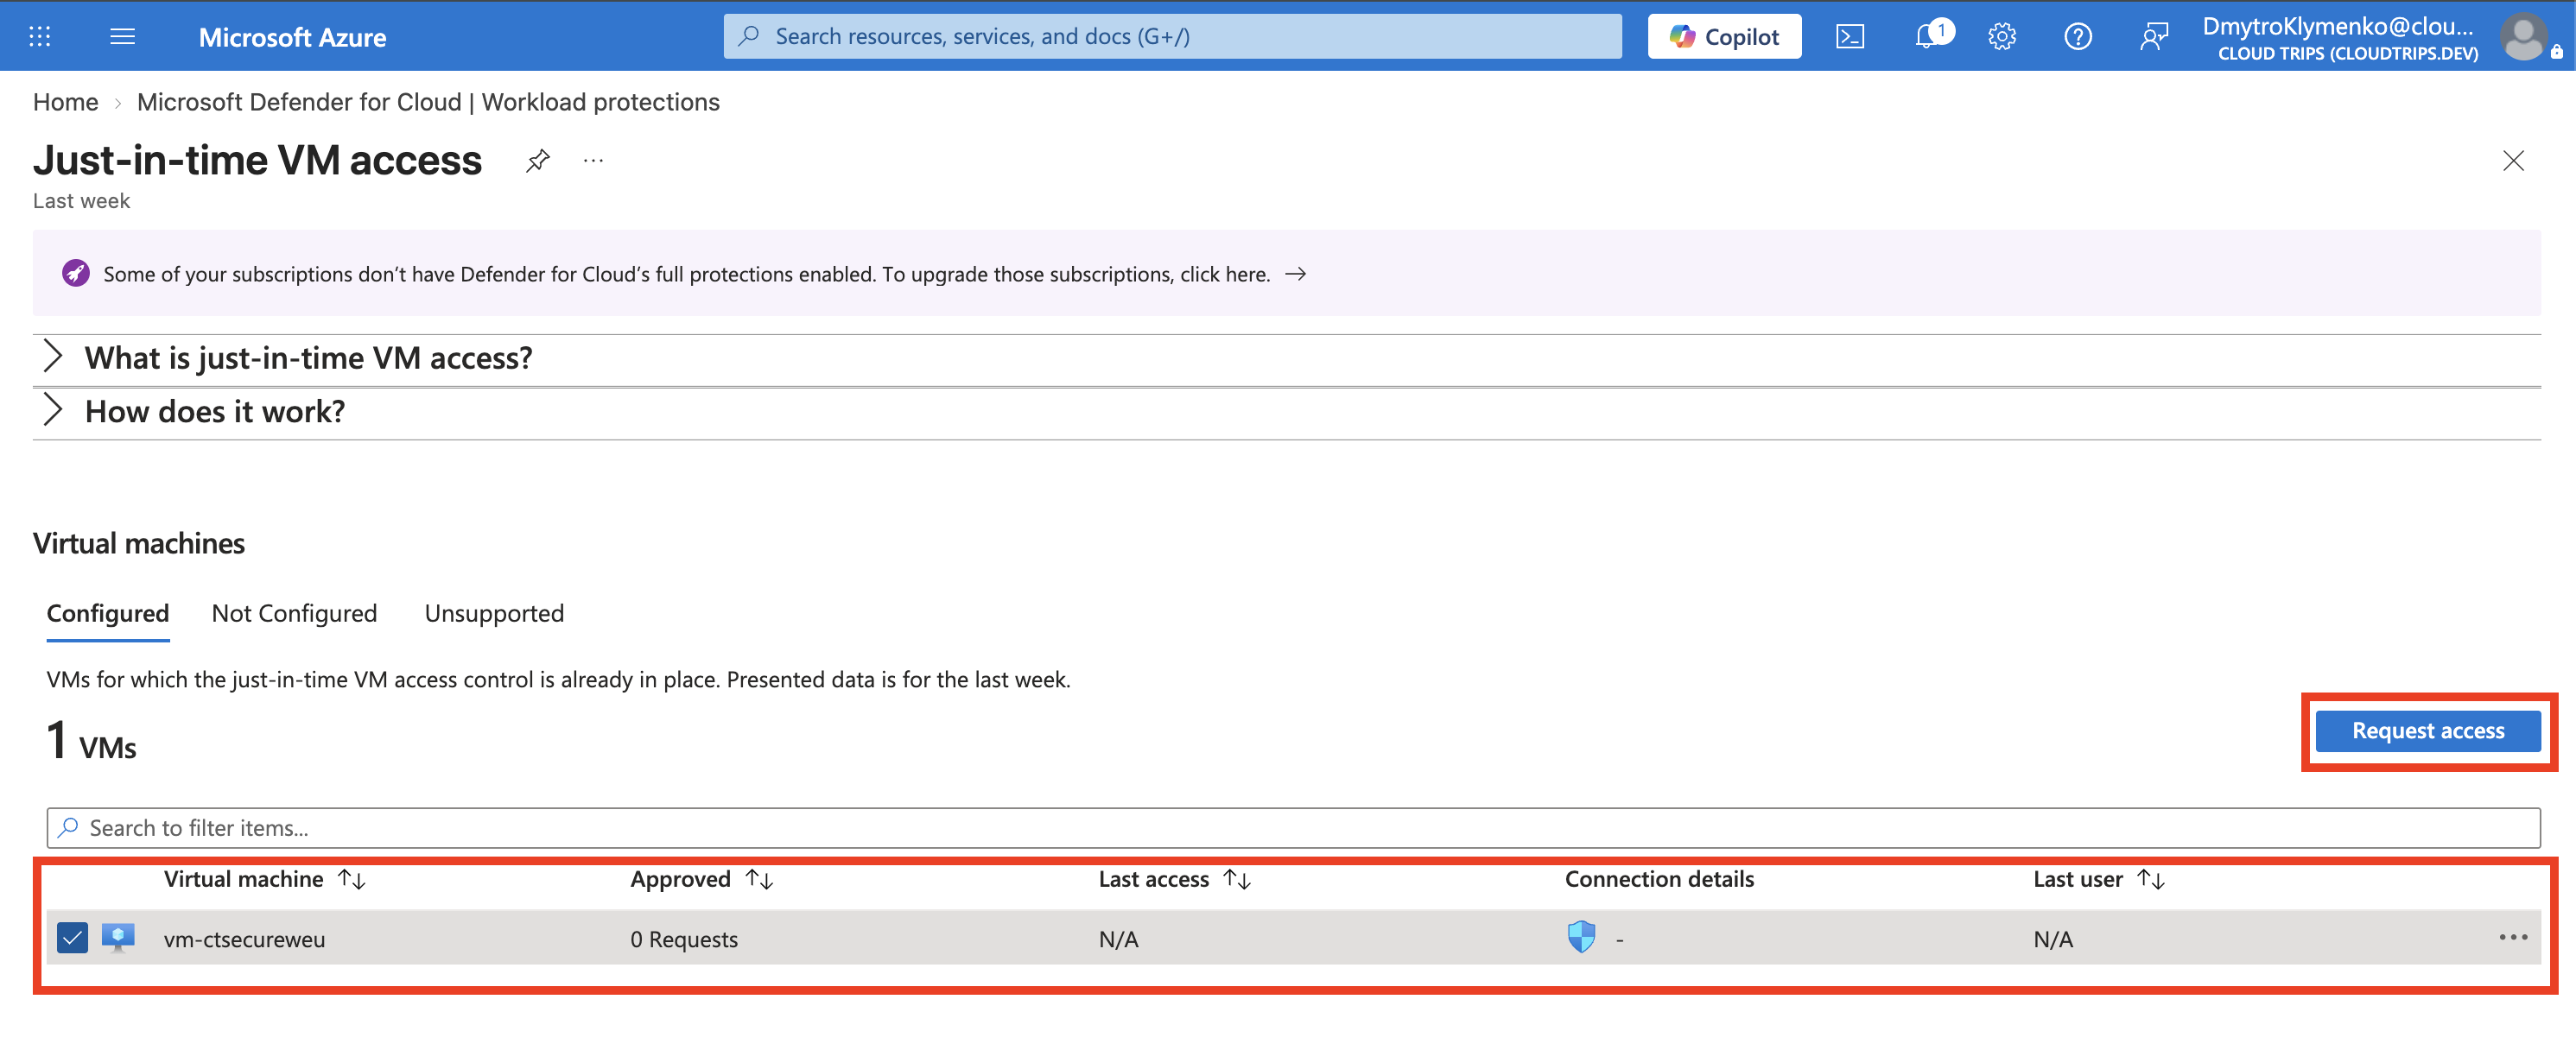
The policy defines what access may be requested. The NSG initially blocks inbound SSH; an approved request temporarily permits the specified source.
Request and Verify Access
Select the VM under Configured → Request access. Turn on the port 22 toggle, select My IP and 1 hour, then select Open ports.
If Azure rejects an IPv6 source address, find your public IPv4 address in Terminal on your Mac:
curl -4 https://api.ipify.orgCopy the returned address. In the access request, choose IP range, enter that address followed by /32 to allow only that IPv4 address, and select Open ports.
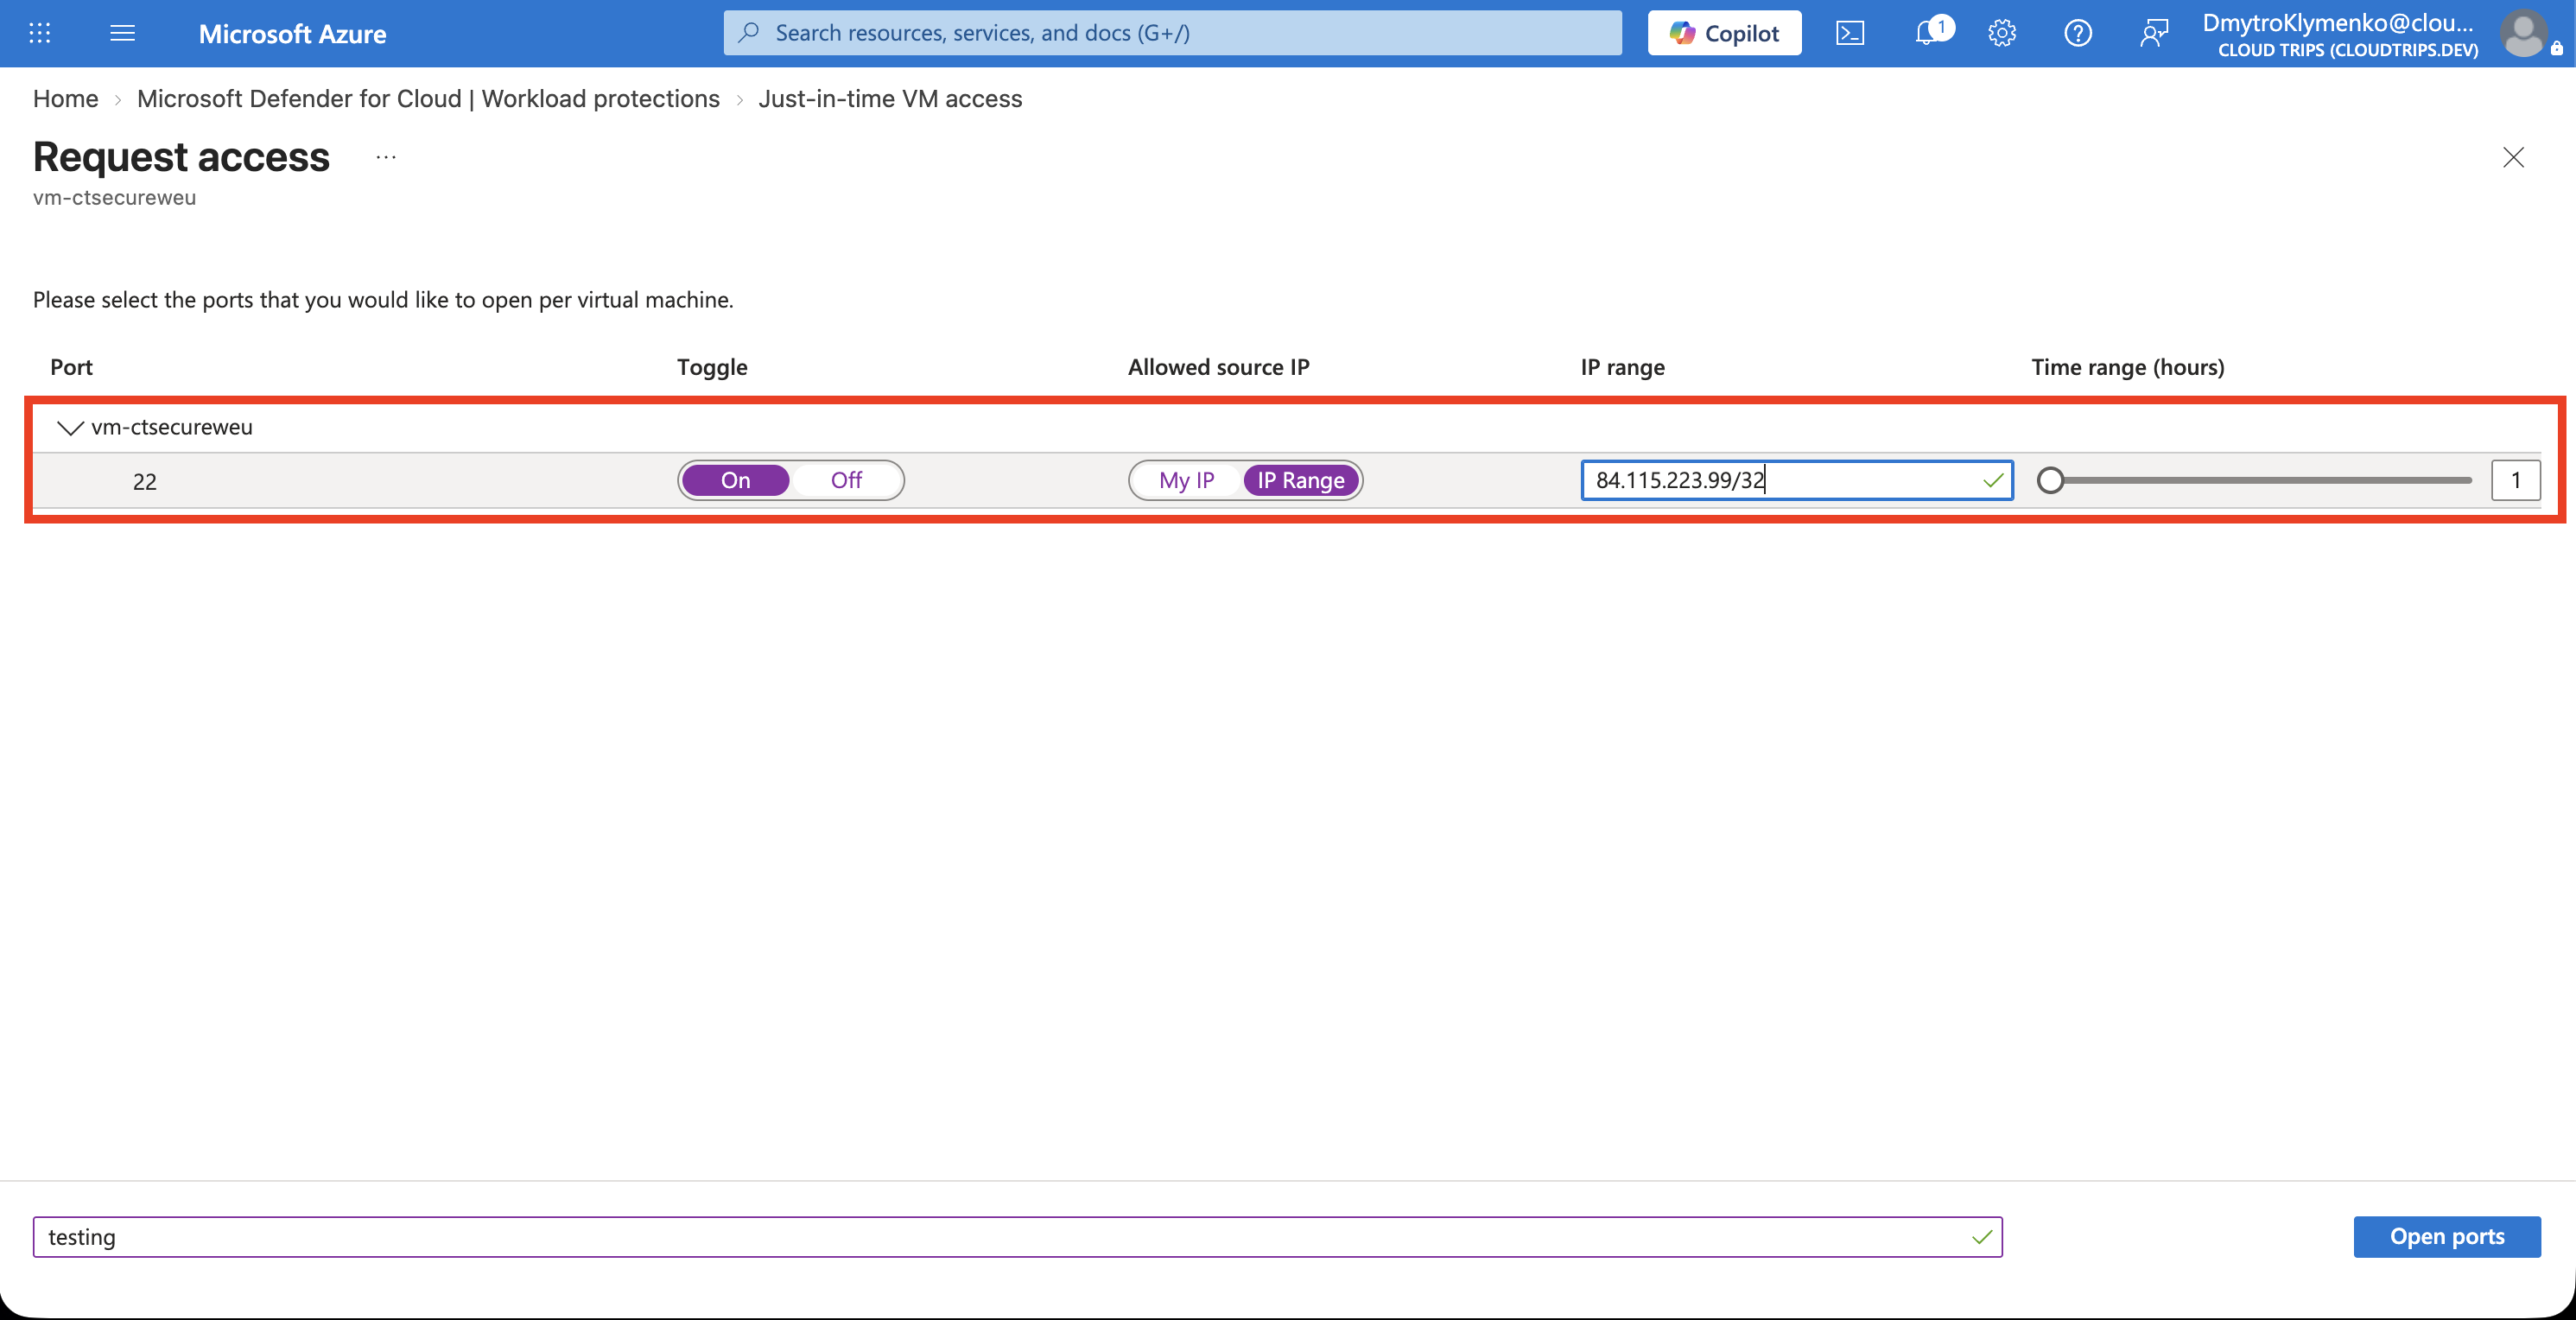
Check the source and expiration. In VM → Networking → Network settings, inspect the NIC NSG’s inbound rules for the temporary SSH allowance. Keep other custom rules consistent with the intended restriction.
Open VM → Connect → Native SSH.
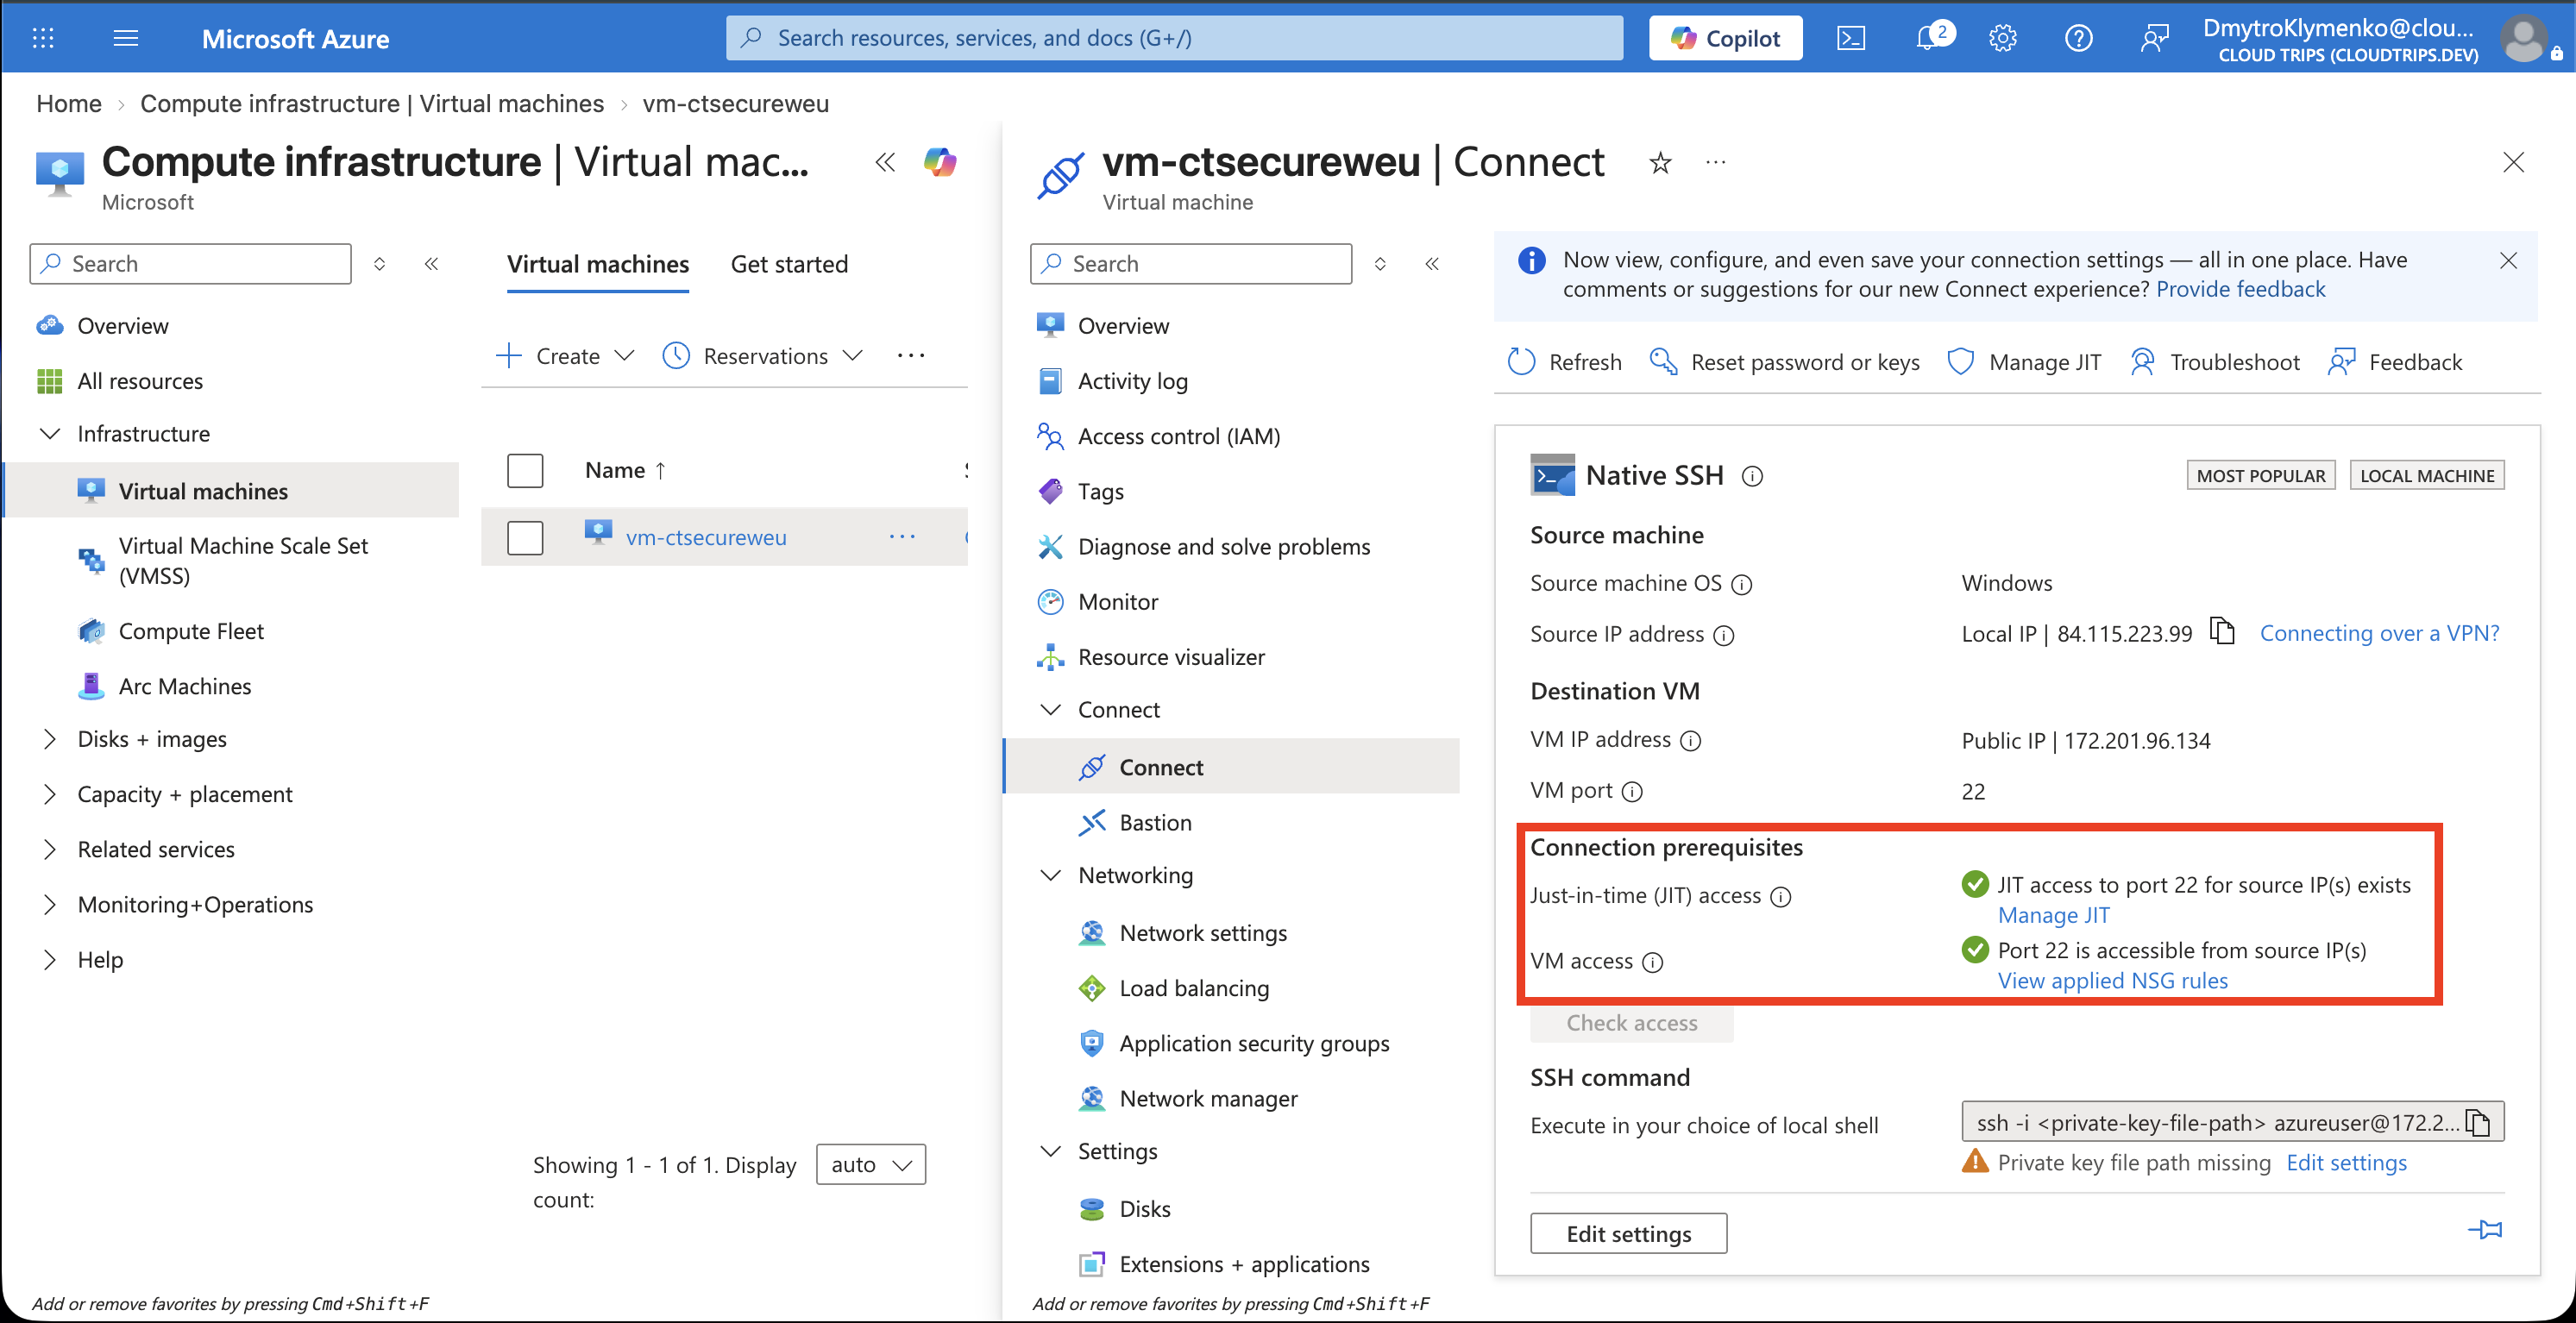
Check that the JIT access indicators are green for your current public IPv4 address and SSH port 22. They confirm the access request is active; use the displayed SSH instructions with your saved key to test login from your Mac. After the window expires, disconnect and test a fresh connection: it should be blocked. Existing connections can persist because NSGs track connection state.
Finish
Delete rg-cloudtrips-vmsecurity-test-weu after the exercise. If you enabled Servers Plan 2 only for this lab, restore its previous setting after reviewing other servers’ protection needs. Deleting the VM leaves the subscription plan setting in place.