App Needs a Shared File System? Create, Mount, and Snapshot Azure Files
CloudTrips needs a conventional shared file system that multiple application instances can mount. Azure Files provides managed SMB and NFS shares without a file-server VM. This trip uses an SMB share mounted on Linux and protects it with a point-in-time share snapshot.
SMB (Server Message Block) and NFS (Network File System) are protocols that make remote storage appear as a normal directory. The storage service behind that directory still matters:
| Azure Files SMB | Azure Files NFS | Previous trip: Blob NFS |
|---|---|---|
| Uses SMB and works with Windows, Linux, and macOS | Uses NFS and primarily targets Linux/Unix applications | Uses NFS 3.0 to expose a blob container to Linux |
Uses the File endpoint: account.file.core.windows.net |
Uses an Azure Files endpoint | Uses the Blob endpoint: account.blob.core.windows.net |
| Stores data in a managed Azure Files share | Stores data in a managed Azure Files share | Stores every file as a block blob |
| Supports SMB authentication and SMB 3.x features | Uses Unix-style identities and permissions | Authorizes NFS access through the permitted network and has more file-system limitations |
| Best for general shared folders and broad OS compatibility | Best when a Linux application expects a conventional NFS share | Best when data must remain accessible through Blob APIs and fits Blob NFS behavior |
This trip uses Azure Files over SMB. Linux identifies an SMB mount as
cifs, and its source contains .file.core.windows.net. In the previous trip,
Linux reported nfs, and the source contained .blob.core.windows.net.
The lab uses a storage account key for a simple mount. That key grants broad access and is effectively an administrator credential; production workloads should prefer supported identity-based authentication and private networking.
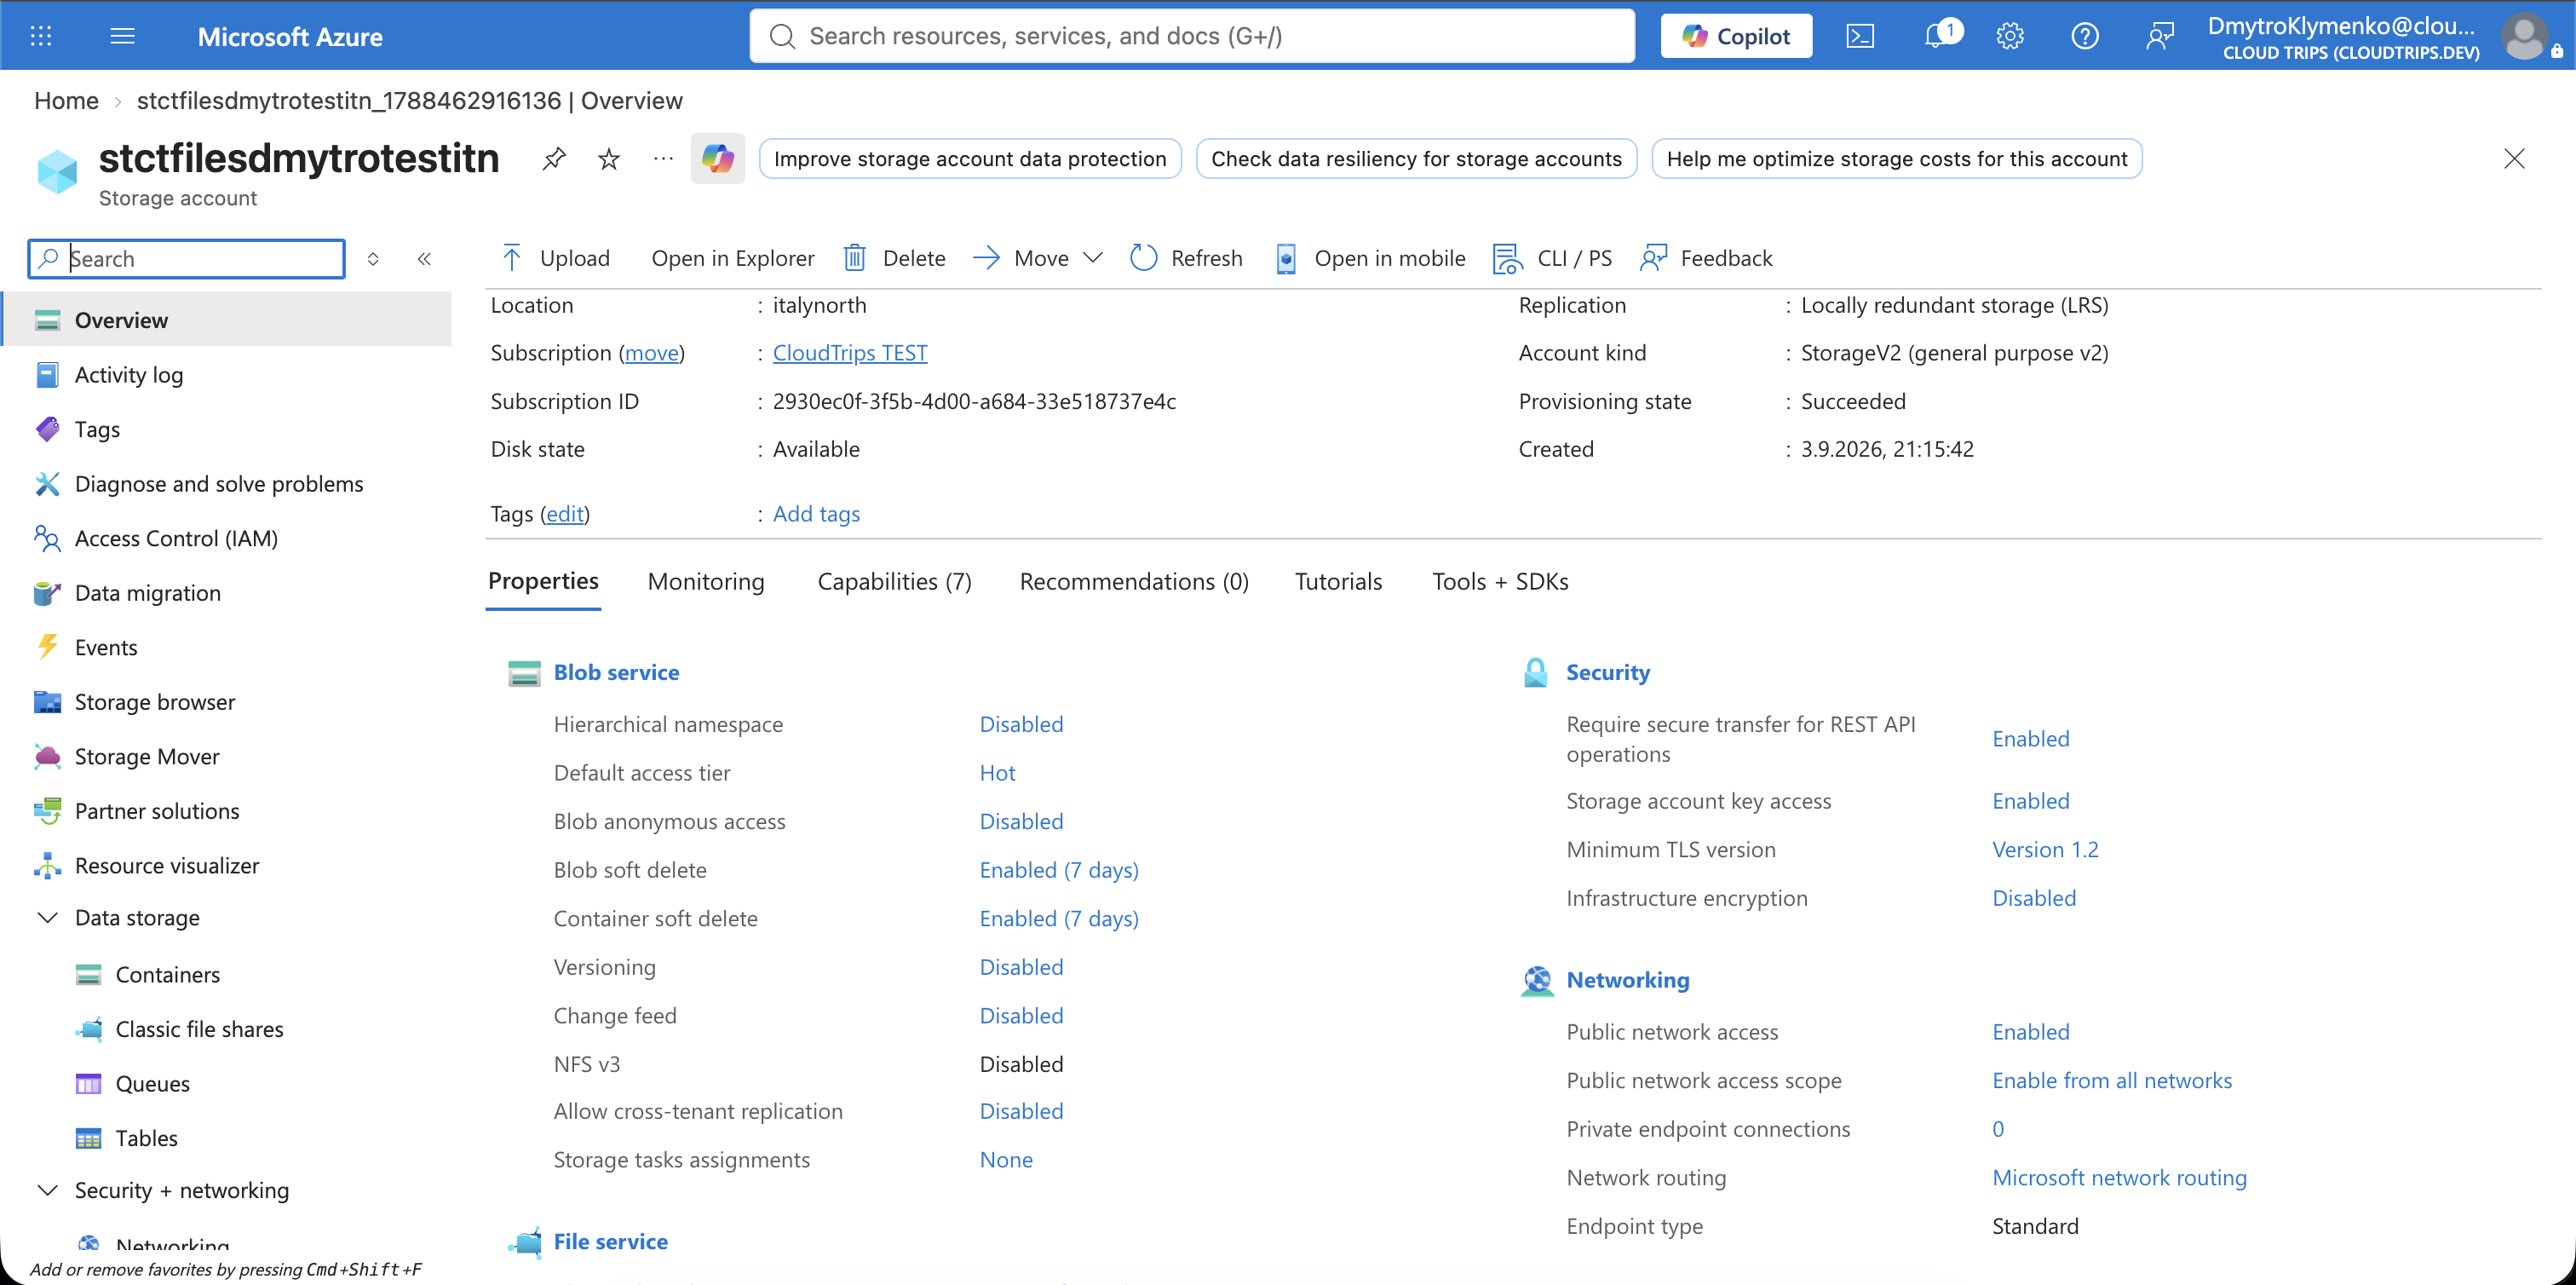
Create the Storage Account
Search for Storage accounts, select Create, and enter:
Subscription: CloudTrips TEST
Resource group: Create new → rg-cloudtrips-files-test-itn
Storage account name: stctfilesdmytrotestitn
Region: Italy North
Primary service: Azure Files
Media tier: HDD
File share billing: Pay-as-you-go
Redundancy: Locally-redundant storage (LRS)
HDD is the lower-cost standard media tier and is sufficient for this small, general-purpose file-share test. SSD provides lower latency and higher performance but costs more. Pay-as-you-go bills the data and operations actually used instead of reserving provisioned file-share capacity.
Keep the hierarchical namespace disabled; it is unnecessary for an SMB Azure file share. On Security, keep Enable storage account key access: Enabled because the lab’s generated mount script uses an account key. Create the account.
Create the SMB File Share
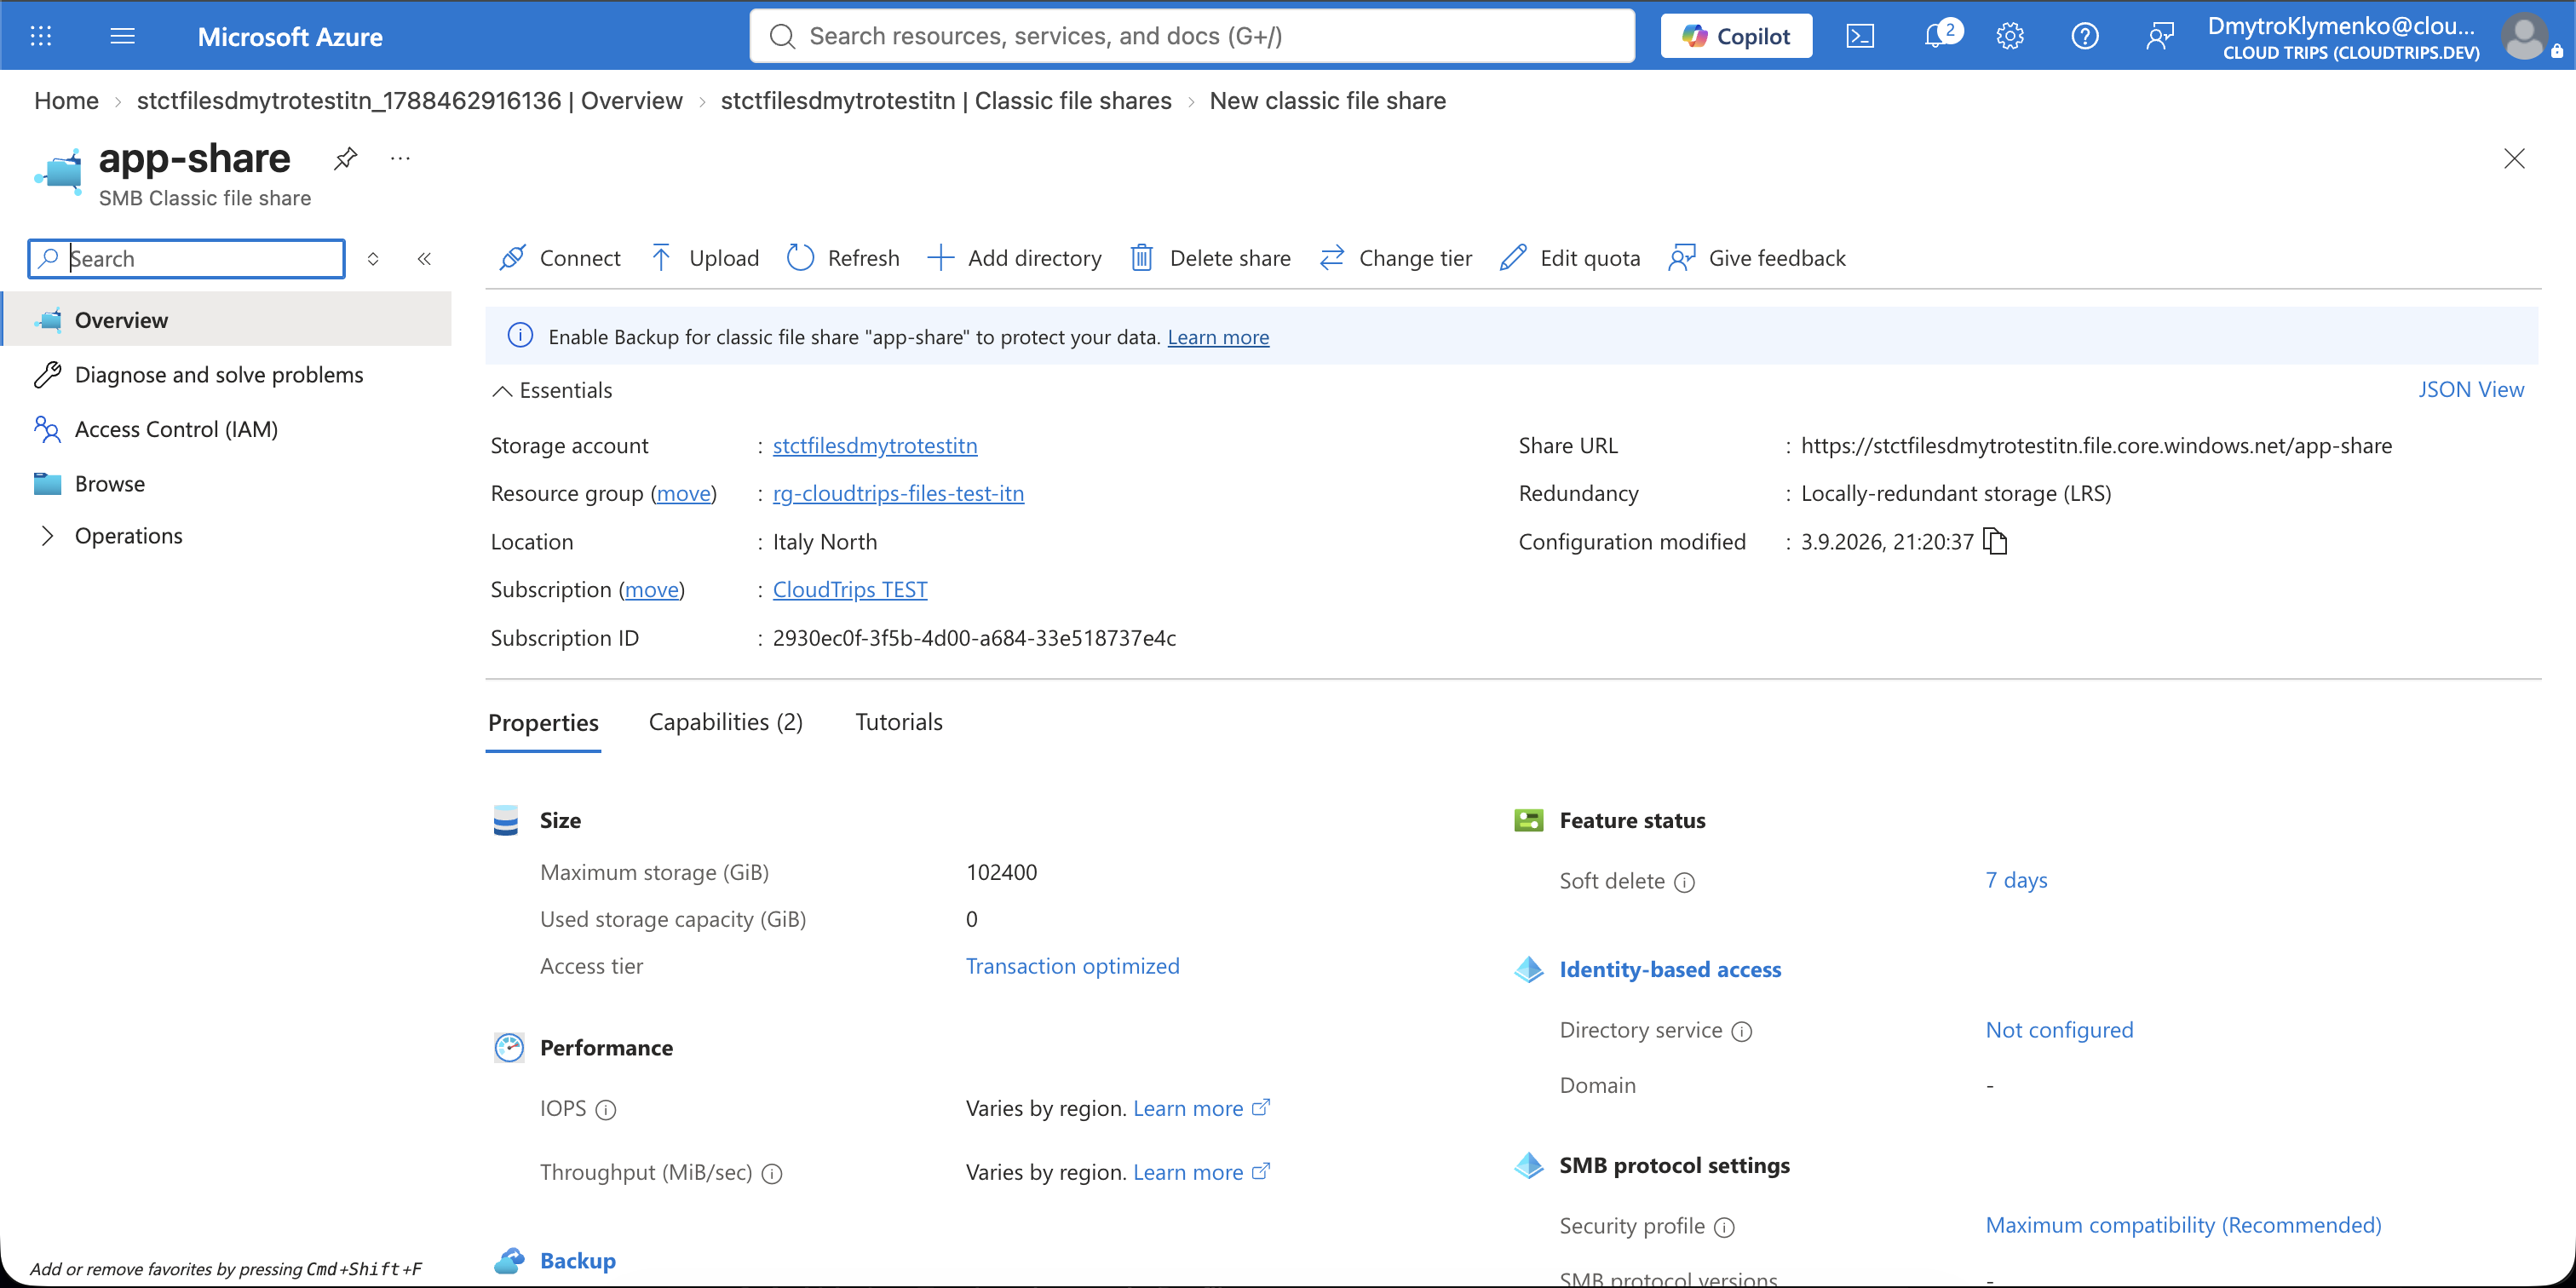
Open the storage account and select Data storage > Classic file shares > + File share. In portal layouts where the word Classic is omitted, select File shares. Configure:
Name: app-share
Access tier: Transaction optimized
Backup: Disabled, if offered
Create the share. Transaction optimized is suitable for a general-purpose lab with frequent file operations. The manual snapshot in this trip is not the same as configuring scheduled Azure Backup.
Create the Linux Client
Create an Ubuntu VM in the same resource group:
Virtual machine name: vm-cloudtrips-files01-test-itn
Region: Italy North
Image: Ubuntu Server 24.04 LTS
Size: Standard D2s v3
Authentication type: SSH public key
Public inbound ports: Allow selected ports
Select inbound ports: SSH (22)
Create the VM, retain its private key securely, and copy its public IP address. Connect from the local terminal with the downloaded key:
chmod 600 ~/Downloads/vm-cloudtrips-files01-test-itn_key.pem

ssh -i ~/Downloads/vm-cloudtrips-files01-test-itn_key.pem \
  azureuser@<VM_PUBLIC_IP>
Use the administrator username selected during creation if it is not
azureuser.
Mount the Share
On the VM, install the Linux SMB client:
sudo apt-get update
sudo apt-get install --yes cifs-utils
In the portal, open app-share and select Connect. Choose:
Operating system: Linux
Authentication method: Storage account key
Copy the generated Linux script and run it inside the SSH session. The script
creates a mount directory, stores the account key in a root-only credential
file under /etc/smbcredentials, and mounts the share through the File endpoint
on TCP port 445. Do not include the generated script or account key in a
screenshot.
If the script displays an org.freedesktop.systemd1.reload-daemon
authentication prompt, cancel it with Ctrl+C and run:
sudo systemctl daemon-reload
sudo mount -a
This happens when systemctl daemon-reload is called without sudo. SSH-key
authentication does not provide a Linux password for that prompt.
Confirm the mount:
findmnt --types cifsThe source should resemble:
//stctfilesdmytrotestitn.file.core.windows.net/app-shareFor this trip, the generated mount path is:
/media/app-shareWrite Version 1 and Take a Snapshot
Create the original shared file:
printf 'CloudTrips shared file - version 1\n' | \
  sudo tee /media/app-share/shared.txt

cat /media/app-share/shared.txt
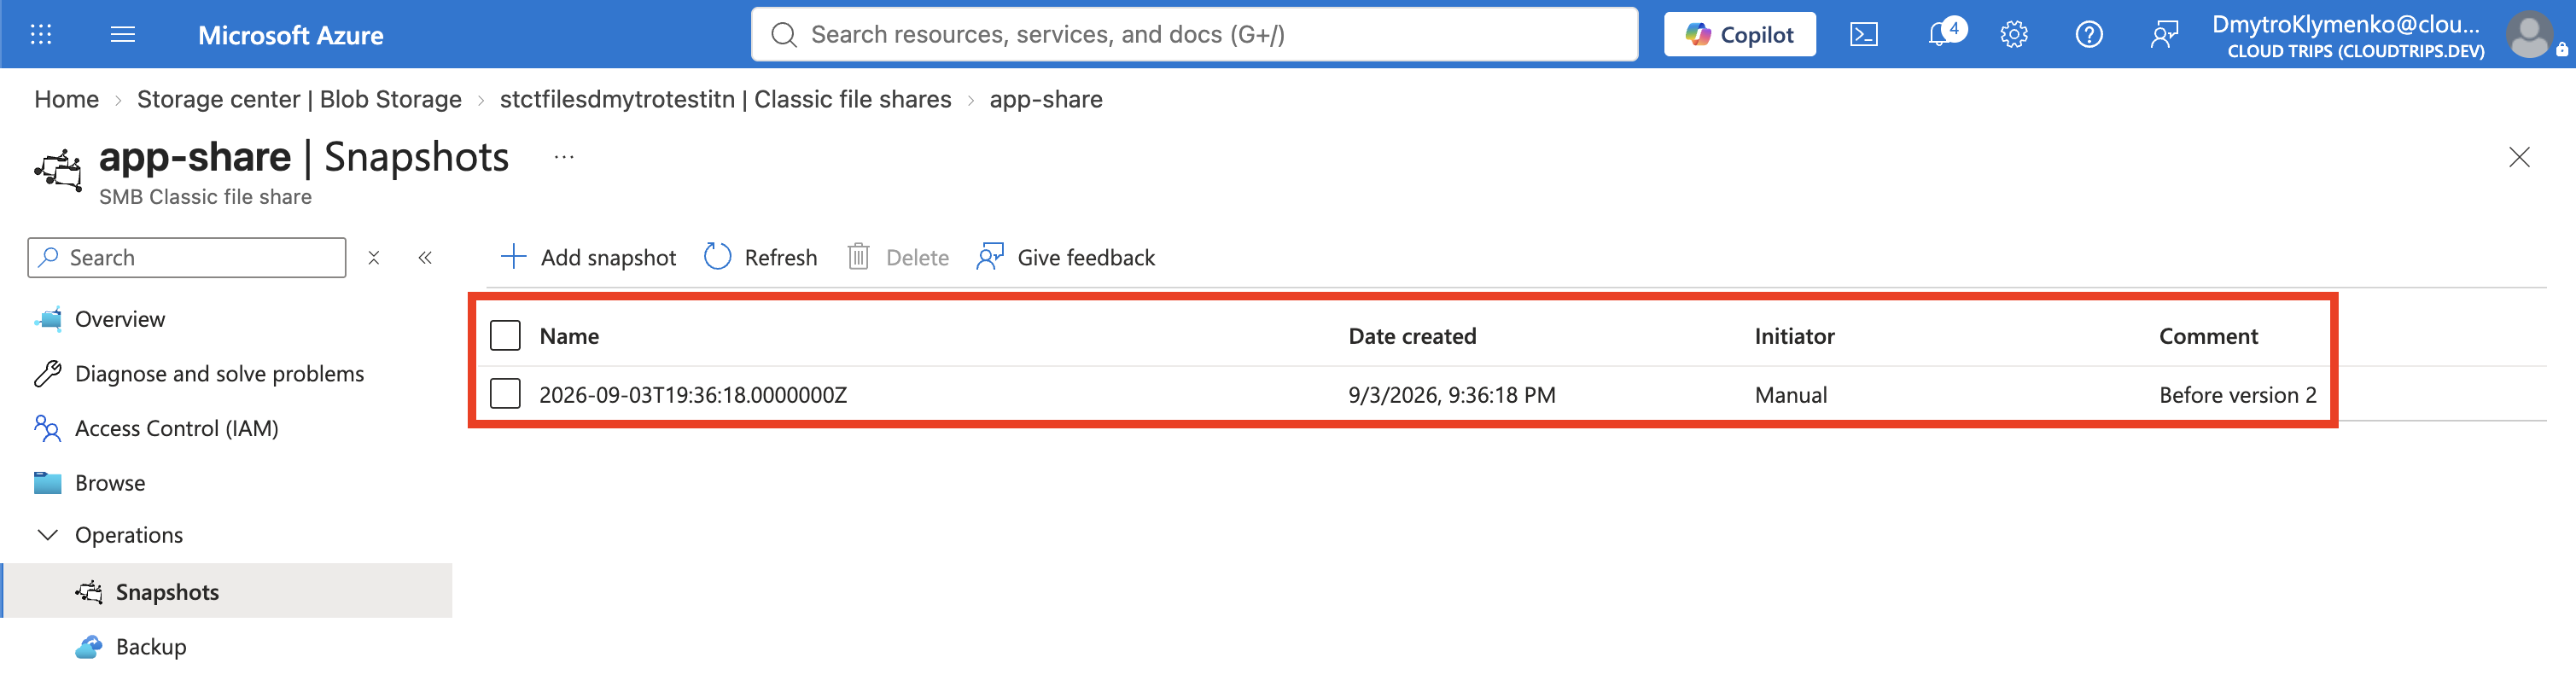
Open app-share in the portal, select Snapshots > + Add snapshot, add
the optional comment Before version 2, and select OK.
A share snapshot is a read-only, point-in-time view of the entire share. It is incremental: Azure charges for changed data rather than immediately duplicating the complete share. It does not automatically replace a backup schedule or protect against deletion of the storage account.
Overwrite the Live File
Write a second version through the same mounted share:
printf 'CloudTrips shared file - version 2\n' | \
  sudo tee /media/app-share/shared.txt

cat /media/app-share/shared.txt
The live share now contains version 2, while the snapshot retains version 1.

Restore Version 1
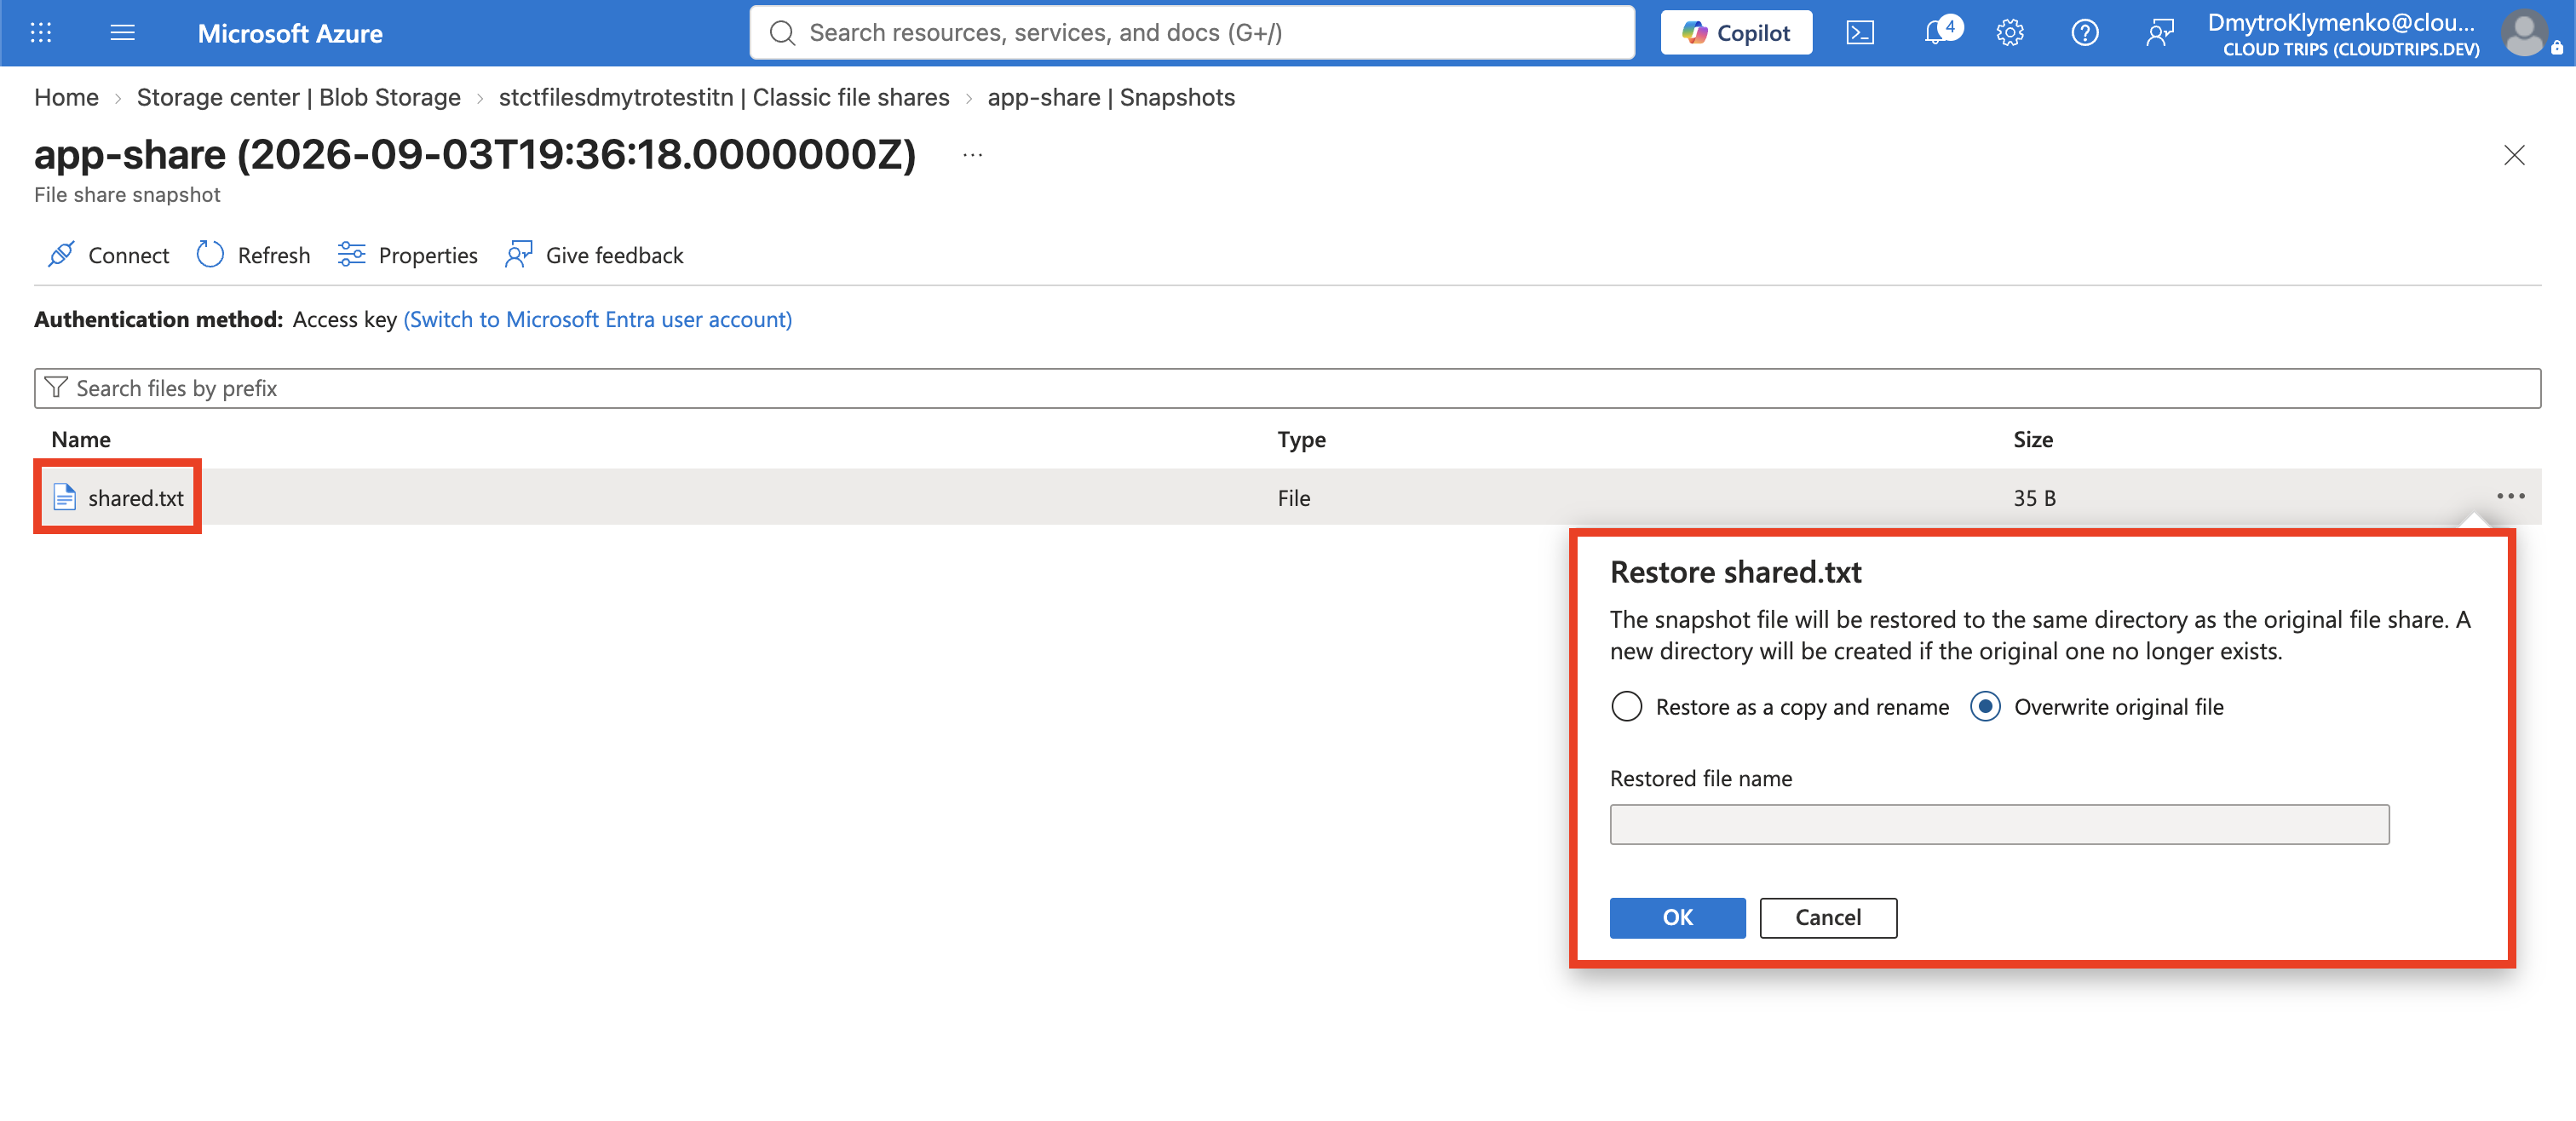
In the share, select Snapshots and open the snapshot. Find shared.txt,
right-click it, and select Restore. Choose Overwrite original file and
select OK. This copies the snapshot’s file back into the live share; the
snapshot itself remains read-only and unchanged.
Return to the SSH session and confirm the recovered content:
cat /media/app-share/shared.txtExpected result:
CloudTrips shared file - version 1
If mounting fails, confirm that the VM can reach
stctfilesdmytrotestitn.file.core.windows.net on TCP 445 and that storage
account key access remains enabled. Some external networks block port 445, but
an Azure VM normally reaches the Azure Files endpoint directly.
Clean Up
Unmount the share before deleting the lab. Use the actual generated mount path:
sudo umount /media/app-shareThen delete the standalone resource group:
az group delete \
  --name rg-cloudtrips-files-test-itn \
  --yes
Confirm that it is gone:
az group exists --name rg-cloudtrips-files-test-itnExpected result: false.